LiquidFiles Windows Authentication Proxy Installation Guide
Prerequisites
- Windows domain infrastructure
- A server running IIS 7 or higher (Windows Server 2003 or higher) with .NET 4
- IMPORTANT! All client machines must be in the same domain, and the server MUST in specified in Local Intranet zone for IE. You can use GPO, such as described in this article.
You can unzip archive into any folder. It is recommended to create a folder under wwwroot:
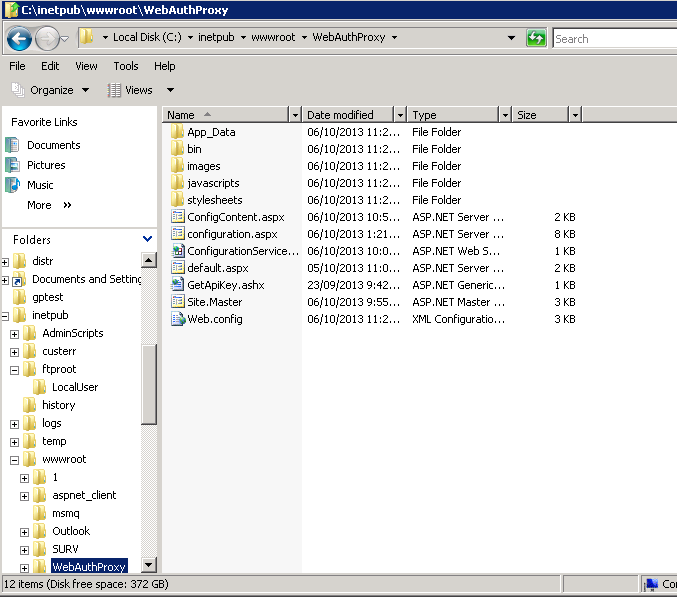
You do not need to set "write" permissions to the folder. However you do need to be able to edit configuration files yourself. To do that, you can launch Notepad by "Run as Administrator" command and open web.config in Notepad.
Step-by-Step instructions
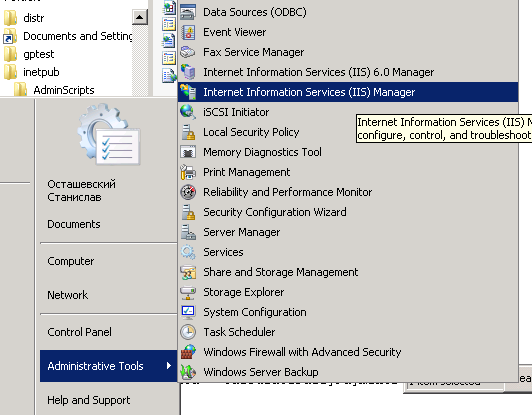
1. Locate IIS Manager under Administrative tools of Control panel
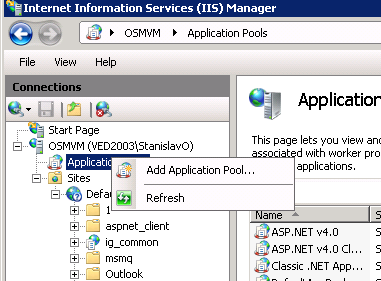
2. Expand your server's node. Rightclick at "Application Pools" and select "Add Application Pool..." from context menu
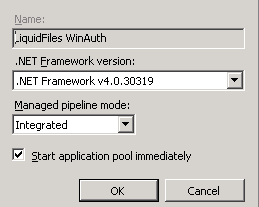
3. Create new Application Pool. Make sure you've specified .Net Framework version 4.0 and not 2.0
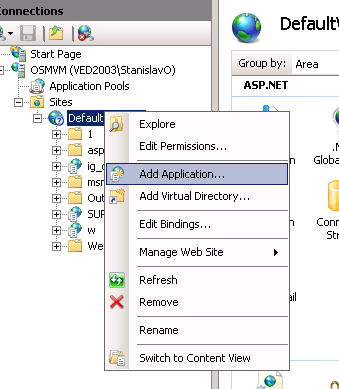
4. Expand "Default website", rightclick it and select "Add application" from context menu.
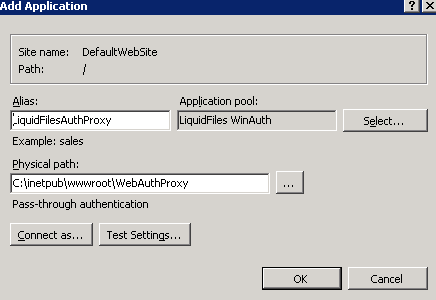
5. Specify Alias for the application, such as LiquidFilesAuthProxy. Specify physical path. Click "Select" button to the right of "Application Pool" to select Application pool created at previous steps.
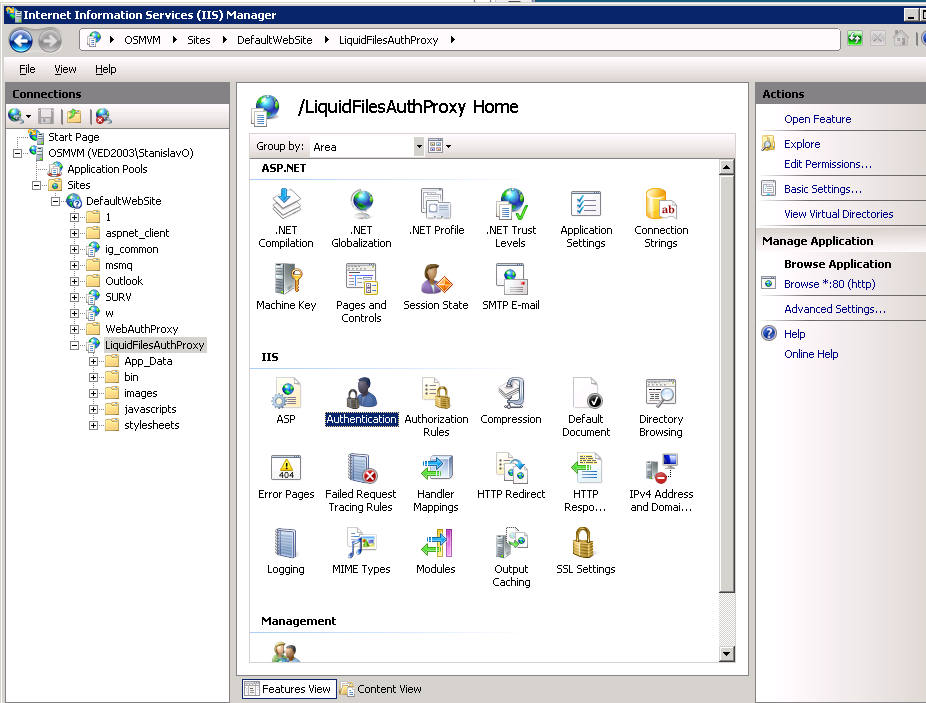
6. Navigate to created application. Locate "Authentication" in Features View. Doubleclick, or click "Open Feature".
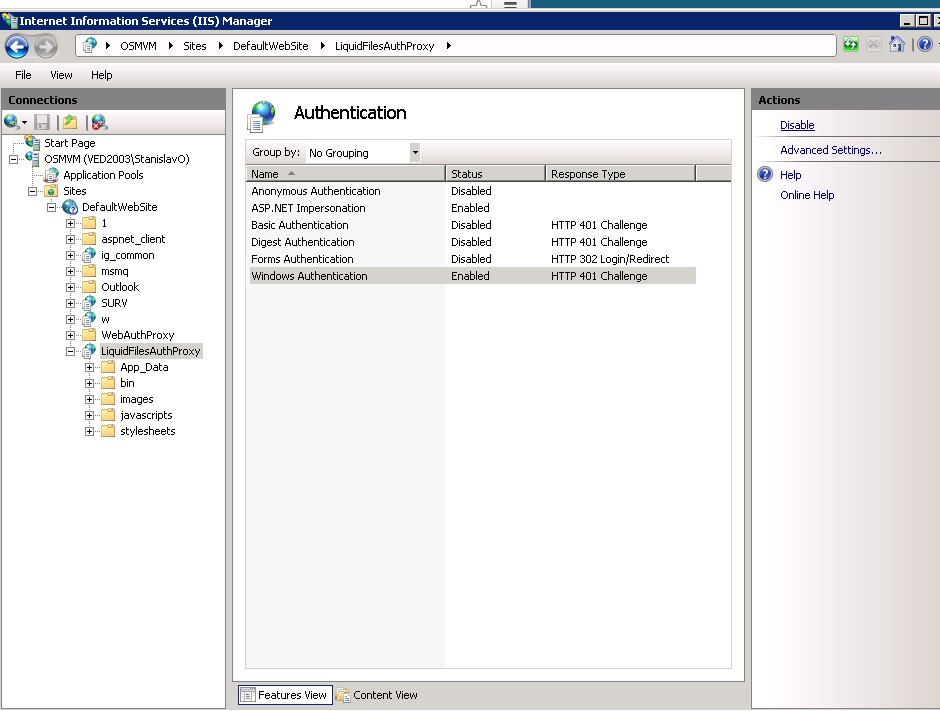
7. Disable Anonymous Authentication by clicking at it and selecting "Disable" on the Action pane to the right. Enable Windows Authentication in the same fashion.
8. Edit web.config file to specify LiquidFilesServiceUrl and LiquidFilesApiKey values.
<add key="LiquidFilesServiceUrl" value="https://liquidfiles.company.com" />
<add key="LiquidFilesApiKey" value="AAAXXXXQQQQTTTT" />
You need to run LiquidFiles server version 2.3.13 or later. LiquidFilesApiKey must be set to API key of administrator of LiquidFiles system.
9. You need to implement authentication between LiquidFiles Authentication Proxy and your domain controller. The recommended way is to set up a domain account with right to query AD (the query itself is specified in `LdapQueryTemplate` setting under `web.config`), then assign IIS app pool to that account and turn impersonation off. Alternatively, you can edit web.config file to specify credentials for account that has right to query Active Directory.
<add key="LdapQueryUserName" value="myadministratorname" />
<add key="LiquidFilesApiKey" value="password_for_administrator" />
You should also edit web.config to specify domain name explicitly
<add key="LdapQueryDomainName" value="my-specific-server" />
10. You can test connectivity by navigating to the created service. Also, you may want to test connectivity to the handler, which is located at https://yourserver/LiquidFilesAuthProxy/GetapiKey.ashx. Make sure to specify /Getapikey.ashx part!
If you get error about "Bind() operation", that means authentication problem at Active Directory. Try changing credentials as per previous step.
Optional
11. You can use "Configuration" page to query all users in your domain and get API keys for them. Note that it will consume licenses at LiquidFiles appliance; if you want to test for specific names only, you should change LdapQueryListUsers, LdapQueryLimitUsers values in web.config.
<add key="LdapQueryListUsers" value="(&(objectclass=user)(objectcategory=person))" />
<add key="LdapQueryLimitUsers " value="100" />
To do this, you need to be authenticated at LiquidFiles Proxy as administrator. You can set OverrideDetectAdmin property to "alwaysAdmin" to bypass this detection completely, or you can set it to "useLookupFile" to look up your name in Administrators.txt under App_Data folder. Please read comments in web.config for details of fine tuning of this optional functionality.
12. Specify full url to the authentication service through Registry policy HKEY_CURRENT_USER\Software\LiquidFiles\SFT\AutoSignInServiceUrl=https://yourserver/liquidfilesproxy/GetapiKey.ashx Make sure to specify /Getapikey.ashx part!
