Migrating to a New Server — Multi-Step migration
This guide is for multi-step migrations, after you have completed an initial migration using one of the available Migration Options for the initial migration.
It's common that we want to test things and migrating servers is definitely one of them. The LiquidFiles migration procedures have all been designed with this in mind. In fact, you can run the migration procedure as many times as you need.
It is important to note that there's no merging of data. If you run a migration, wait a while and run the migration again. Any changes on the destination system will be overwritten by the changes on the source system. This includes any files that exists on the destination system will be deleted unless they also exist on the source system.
Preparing the Source System
Create locally authenticated Sysadmin Account
On the existing LiquidFiles source system, we recommend that you first ensure that you have a locally authenticated sysadmin account with no 2-factor authentication enabled. Please navigate to Admin → Users on your existing source system, and either change an existing account or create a new Sysadmin account that doesn't use LDAP/SAML or any 2-factor authentication.
The reason we recommend this is because if you rely on LDAP/SAML or require 2-factor authentication to authenticate users, there's a risk that the new system can't reach the LDAP server, that the SAML server isn't configured to match the new system, that time is not correct for TOTP, you cannot reach the SMS OTP delivery system, DUO and similar issues. Once the new destination system is up and running and you have tested all authentication options you have configured, you can delete this Sysadmin account, or re-enable the required options on the new destination system.
Starting the Migration on the source system
To start the migration, login as root on on the source system, either on the console or using SSH, and run the ft migrate command. Please see the Console Access Guide for more details how to access the console. It will look similar to this:
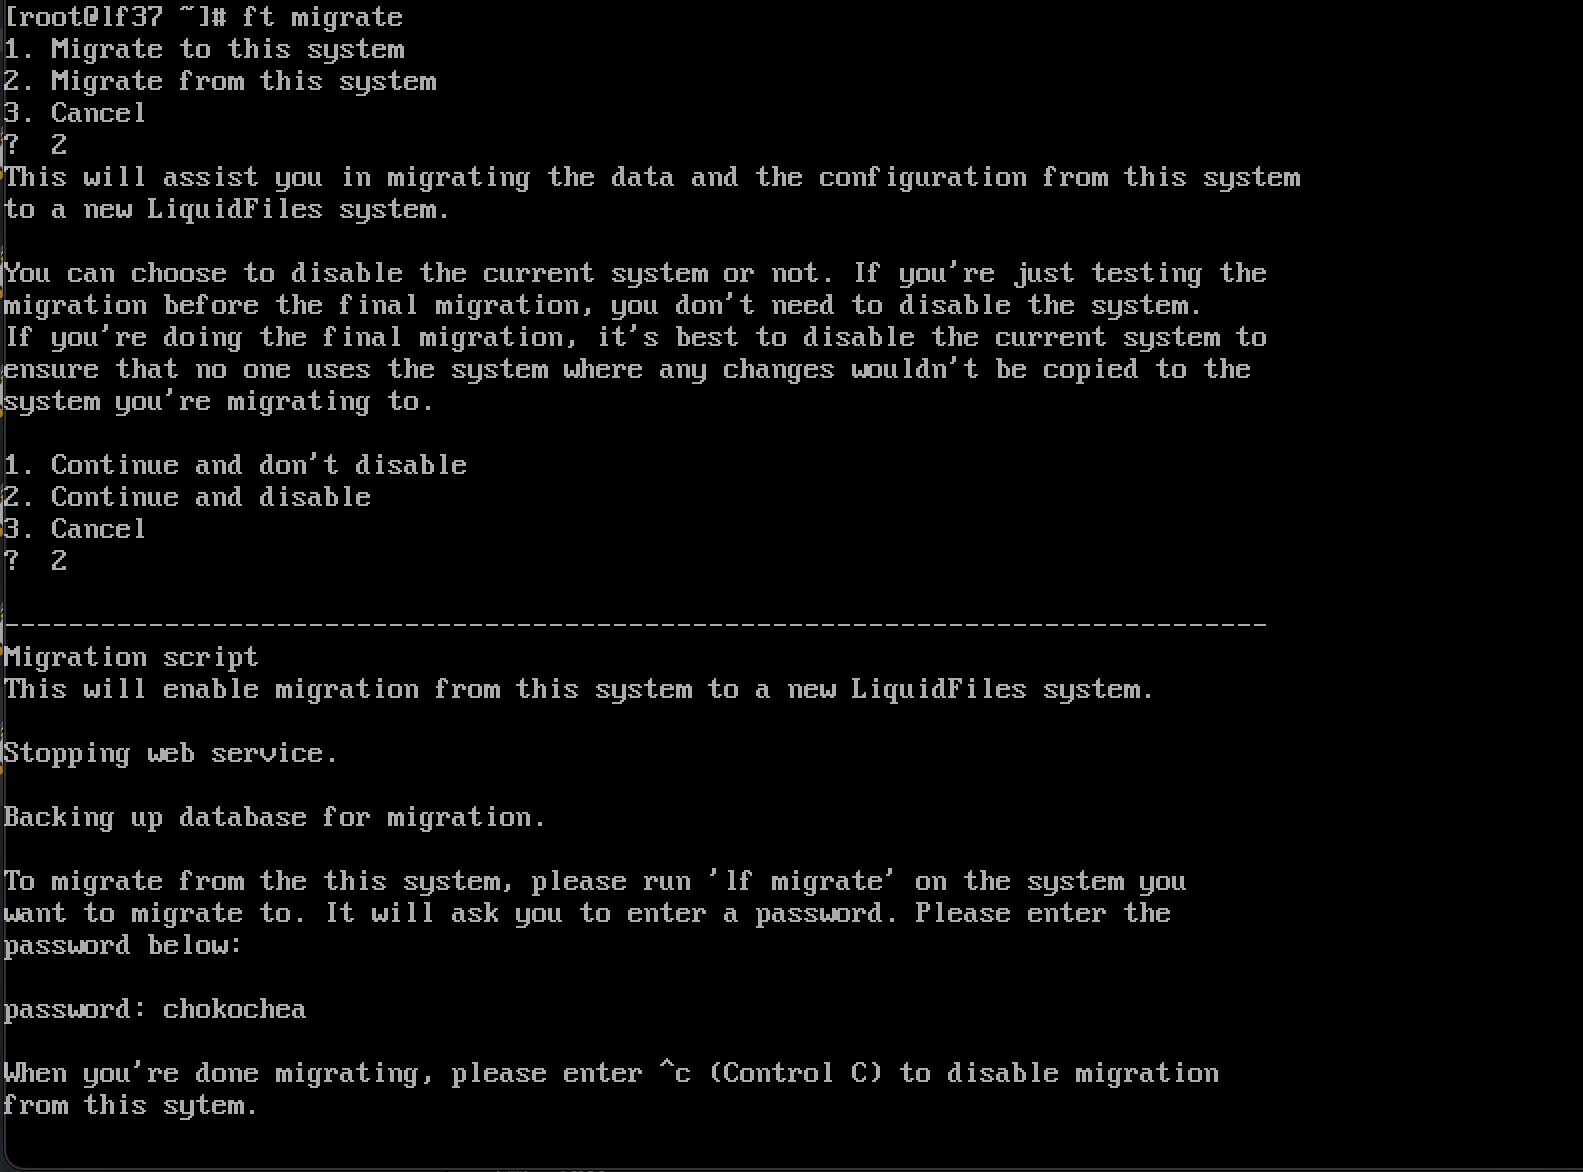
A couple of things to note about the source system:
- Please note the password chokochea in this screenshot that you will need to enter on the destination system when you start this migration.
- The function to migration from this source system is only available while the ft migrate command is running. If you interrupt it with control c, or the SSH connection is terminated, ft migrate will stop running and you cannot start or complete the migration and you will need to restart it.
Continue and disable option
What the Continue and disable option does is that it blocks connections to the LiquidFiles application on the source system. This is a temporary block. It does not delete, remove or permanently changes anything on the source system. When you've completed the production change-over and for whatever reason decides that you need to rollback. When you stop ft migrate by pressing control c, it will remove this block and your users can once again connect to the LiquidFiles application and send files, exactly how it was before.
The reason the Continue and disable option exist is that if there's any changes on the source system after you've started ft migrate, those changes will not be migrated to the destination system. ft migrate makes a copy of the database that is copied over to the destination system and anything that happens on the source system after you've run ft migrate will not be included in the database backup and will not be migrated to the destination system.
Should you select the Continue and disable option?
- Are you performing any form of test migration or multistage migration where another final migration will come after this migration — select Continue and don't disable.
- Final migration in a multistep migration or single-step migration — select Continue and disable.
Destination Configuration
Again, please note that you can run this as many times as you like.
If you're satisfied and want to skip this step, please go do the Production Change-Over section.
For each migration, you will need to login to the System Console and run the ft migrate command both on the source and destination system (other options are only available for the initial migration).
When you run a multistage migration, only the difference is copied after the first migration. So if your source system has 1TB of data and only 2GB has been uploaded since the last migration, only 2GB of data will be copied instead of 1TB. This is therefore also a good way of minimizing downtime where the final Production Change-Over migration will be much faster with often a fraction of the data to copy.
Destination System
On the destination system, please login to the Console and run the command ft migrate and follow the options below.
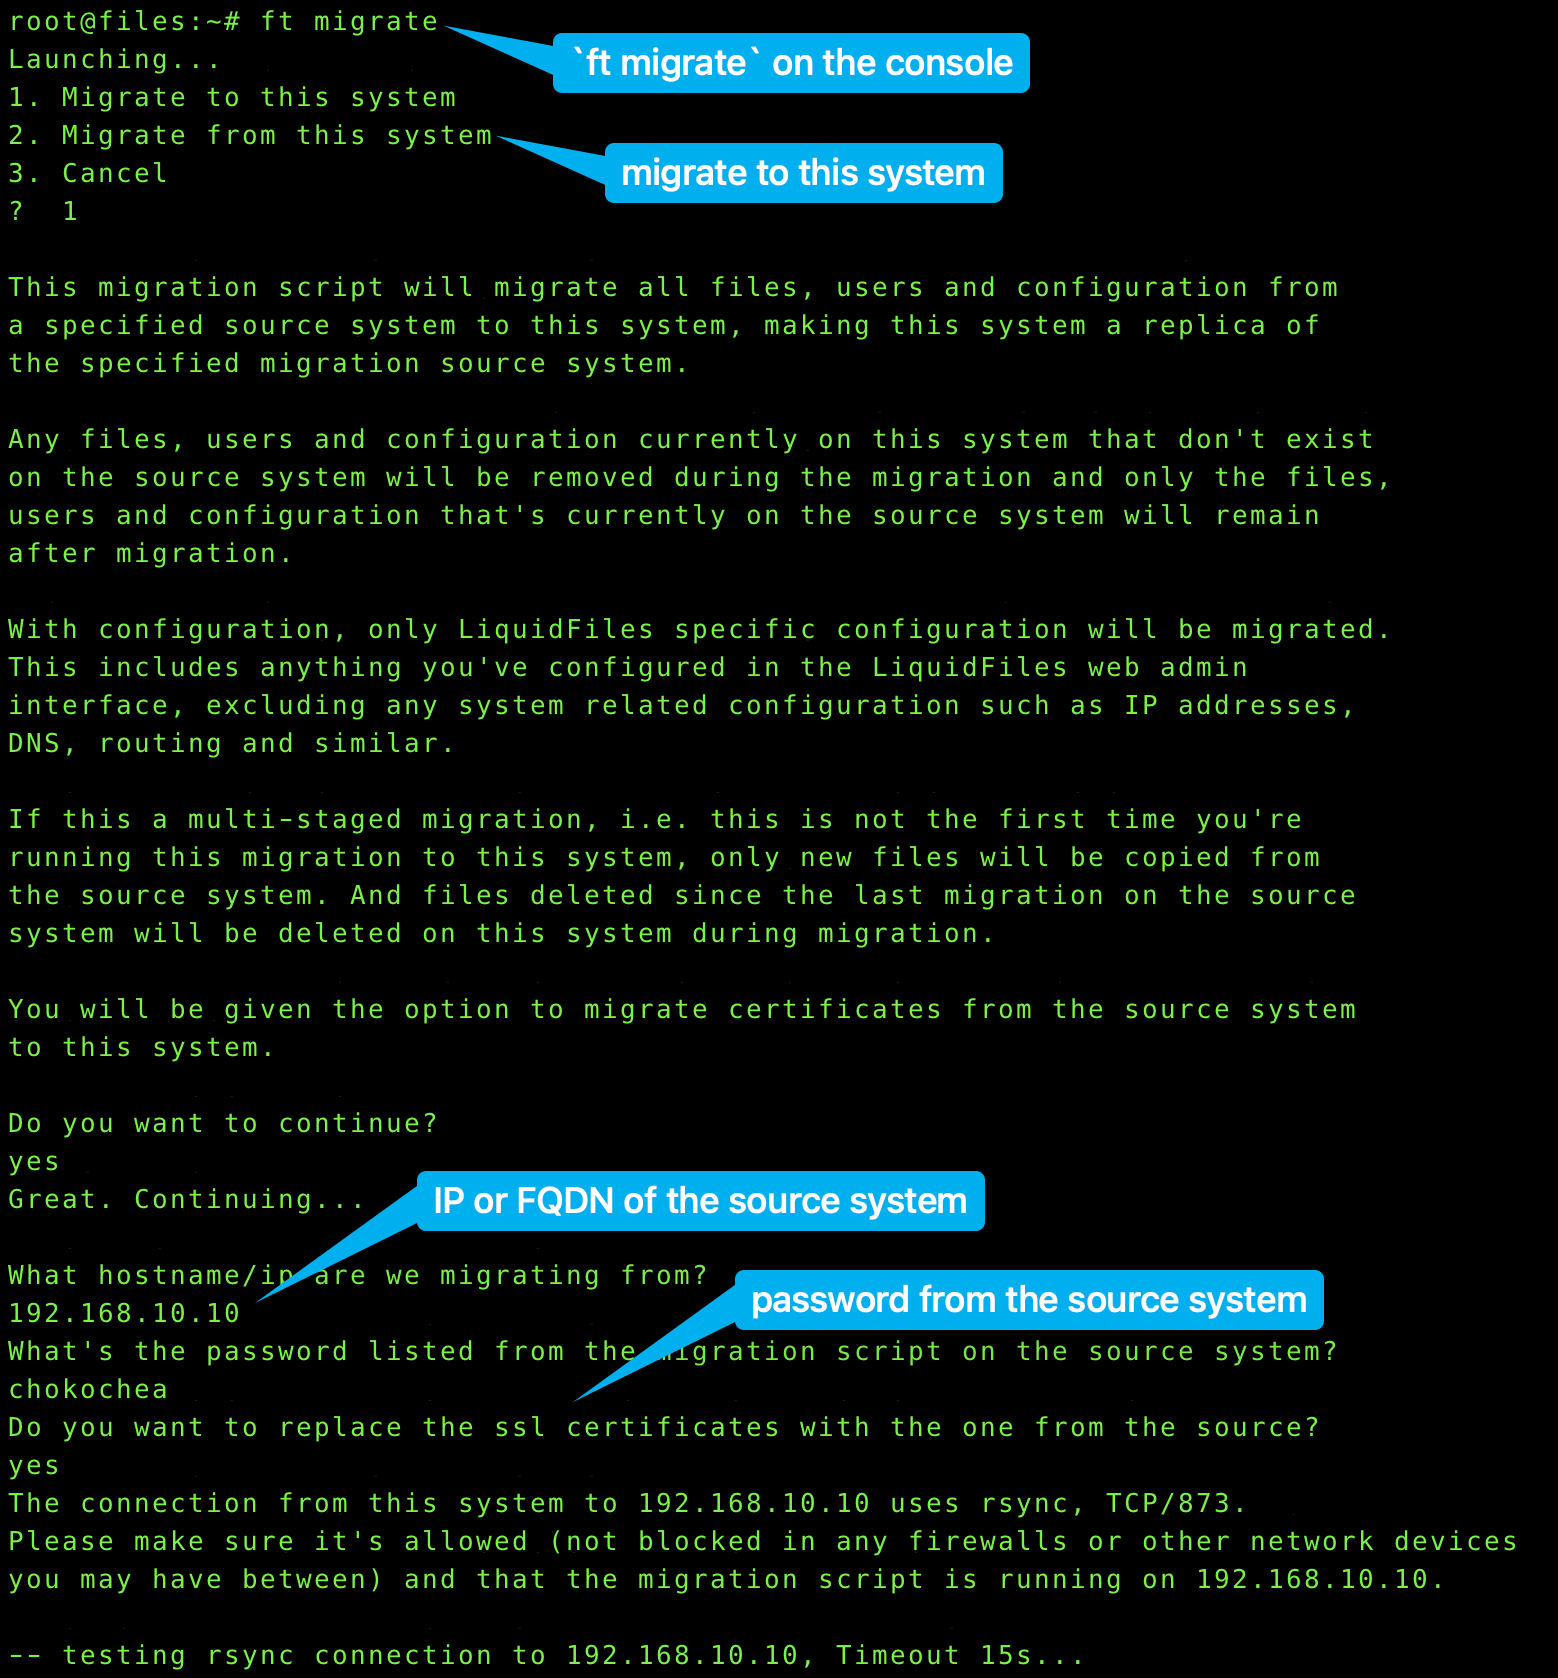
Please take note of the current migration password from the source and enter the correct one here. This will change on every migration. If it doesn't you will need to re-run ft migrate on the source system so that you'll get a new password (and have it create a new database backup with the latest data).
Troubleshooting
If the migration has completed successfully but you cannot access the system properly, it's usually one of the following two common issues.
Cannot authenticate with sysadmin account?
If you didn't create a locally authenticated sysadmin account, and the new destination system can't authenticate (because you cannot reach the LDAP server or similar). Please login to the System Console and run the command ft add_admin to create a new locally authenticated sysadmin account, or ft reset_admin to reset the first sysadmin account on the system.
You get redirected to the source system?
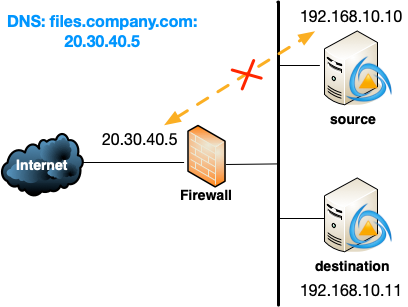
It's possible to configure LiquidFiles with strict hostname validation. If your Public Hostname is https://files.company.com, with strict hostname validation you will get redirected to this hostname. If you haven't done the Production Change-Over, this will redirect you to the source system.
You can disable this strict hostname validation by logging in to the System Console and run the command ft hostconfig. You will be asked a few configuration question. The important one in this instance is the strict hostname validation that needs to be disabled.
Storage usage looks different on source and destination after migration?
This is expected. LiquidFiles v3.7 uses an XFS filesystem for its data partition, while v4 uses ext4. The storage figure shown in the Admin dashboard is read directly from the operating system's disk usage reporting, and these two filesystems account for used space differently.
XFS uses speculative preallocation: as files are written, XFS pre-allocates disk extents beyond what the data currently occupies. These pre-allocated blocks are counted as used space even if they don't contain active data yet. On a system that has processed a large amount of file traffic over time, this overhead can be substantial.
ext4 only allocates exactly the space the data occupies. When migration copies files from the source, it transfers the actual file content — not XFS's extra pre-allocated blocks. The result is that the same data will appear to occupy significantly less space on the destination (ext4) than on the source (XFS). This is normal. Your data is intact and the lower figure on the destination is the true data size.
Production Change-Over
When you have completed the migration, the destination system will be identical to the source system when it comes to any LiquidFiles related data such as users, groups, configuration, messages, data, ...
When you're ready to change over the source and destination system, making the destination system the new production system, there are three basic options. Each of these options are outlined in the Migration Overview guide.