Logging in to the System Console
While console login as root is permitted with LiquidFiles. That does not mean that making any changes are supported.
If you login to the console, it is assumed that you know what you are doing and are comfortable administrating Unix/Linux/Ubuntu systems.
If anything happens and you don't know how to fix it, you will likely have to re-install the LiquidFiles system to get back to a supported state.
Please see the Third Party Software article for commentary on how to add any third party software to LiquidFiles.
How do I login to the console in LiquidFiles?
Every system has a console, either you have a physical system to which you connect a keyboard and monitor, or you have a virtual system where the virtual system provides the console somehow. In VMware ESX for instance, there's a console tab.
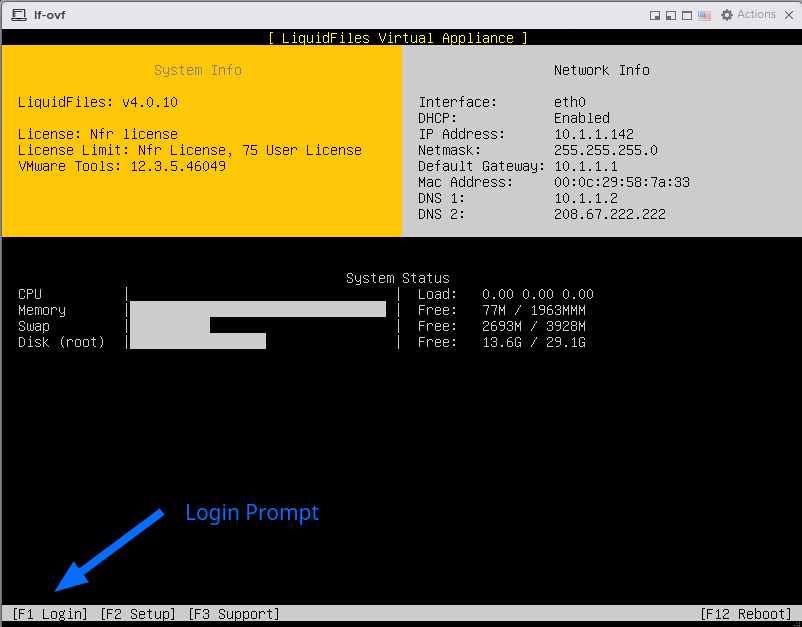
After you've clicked on the console tab (or where the console is located in your virtual system), you can click F1 (or ESC and F1 on some hosts) to get to the login prompt.
Root password
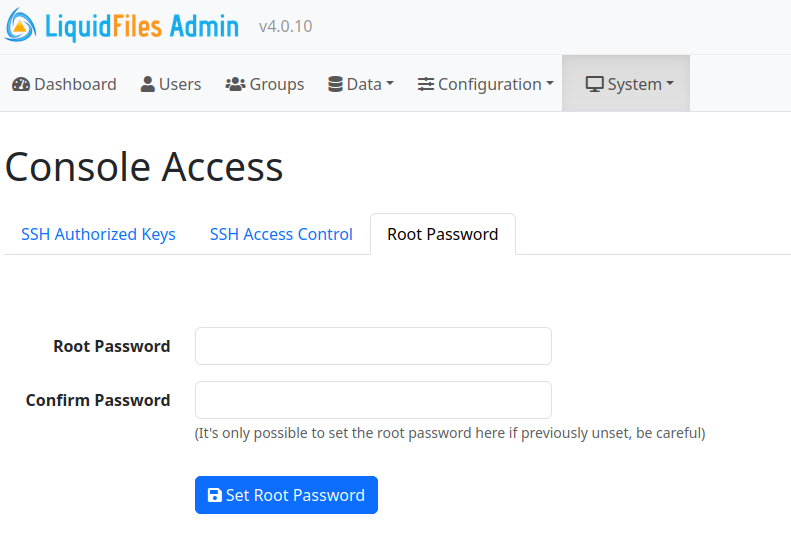
You login to the console as the user root. There's no default root password. You set the root password in Admin → System → Console Access.
Reset Root password
If you don't remember the root password, you need to reset it. To reset the Root Password, please go to Admin → System → Console Access. Click on the Root Password Tab and you will see the instructions there.
SSH Login
Since LiquidFiles v4 you can only login using SSH keys and only to a non-root user. You cannot login using passwords and you cannot login to the root account using SSH. In AWS and Azure, this has always been the case and since LiquidFiles v4, this requirement has now been extended to all LiquidFiles deployments.
When you create a LiquidFiles system in AWS or Azure, you got prompted to select, or add, an SSH Key to use when logging in using SSH. For other deployments, or if you wish to add additional SSH Keys, you can add that as outlined in the SSH Keys section of this article.
SSH User
If your LiquidFiles was created in Azure, you got prompted to enter a username for the account name. In AWS and every other deployment, the SSH username would always be liquidfiles.
SSH Login on Windows
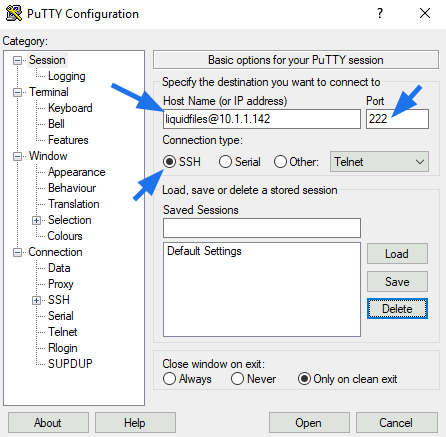
LiquidFiles uses TCP Port 222 for SSH Admin Access (the default SSH port 22 is used for FTPdrops). In this example, we're using the Windows client Putty. You can use any similar SSH client and they will all have similar configuration options.
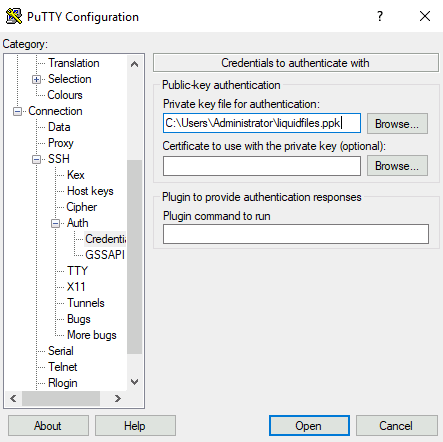
Next step is to go to Connection → SSH → Auth → Credentials → Private key file for authentication, and select the private SSH Key you want to use:
SSH Login on Unix/Linux
The equivalent example on a Unix/Linux system would be:
user@system% ssh -p 222 -i /path/to/private_ssh_key \
    liquidfiles@liquidfiles.mycompany.com
Becoming root when logged in via SSH
To become root (superuser), after you've logged in with SSH please run sudo bash as:
[liquidfiles@liquidfiles ~]$ sudo bash
[root@liquidfiles ~]#
Adding additional SSH Keys
You can add as many additional SSH keys you wish by adding them in Admin → System → Console, in the SSH Authorized Keys tab:
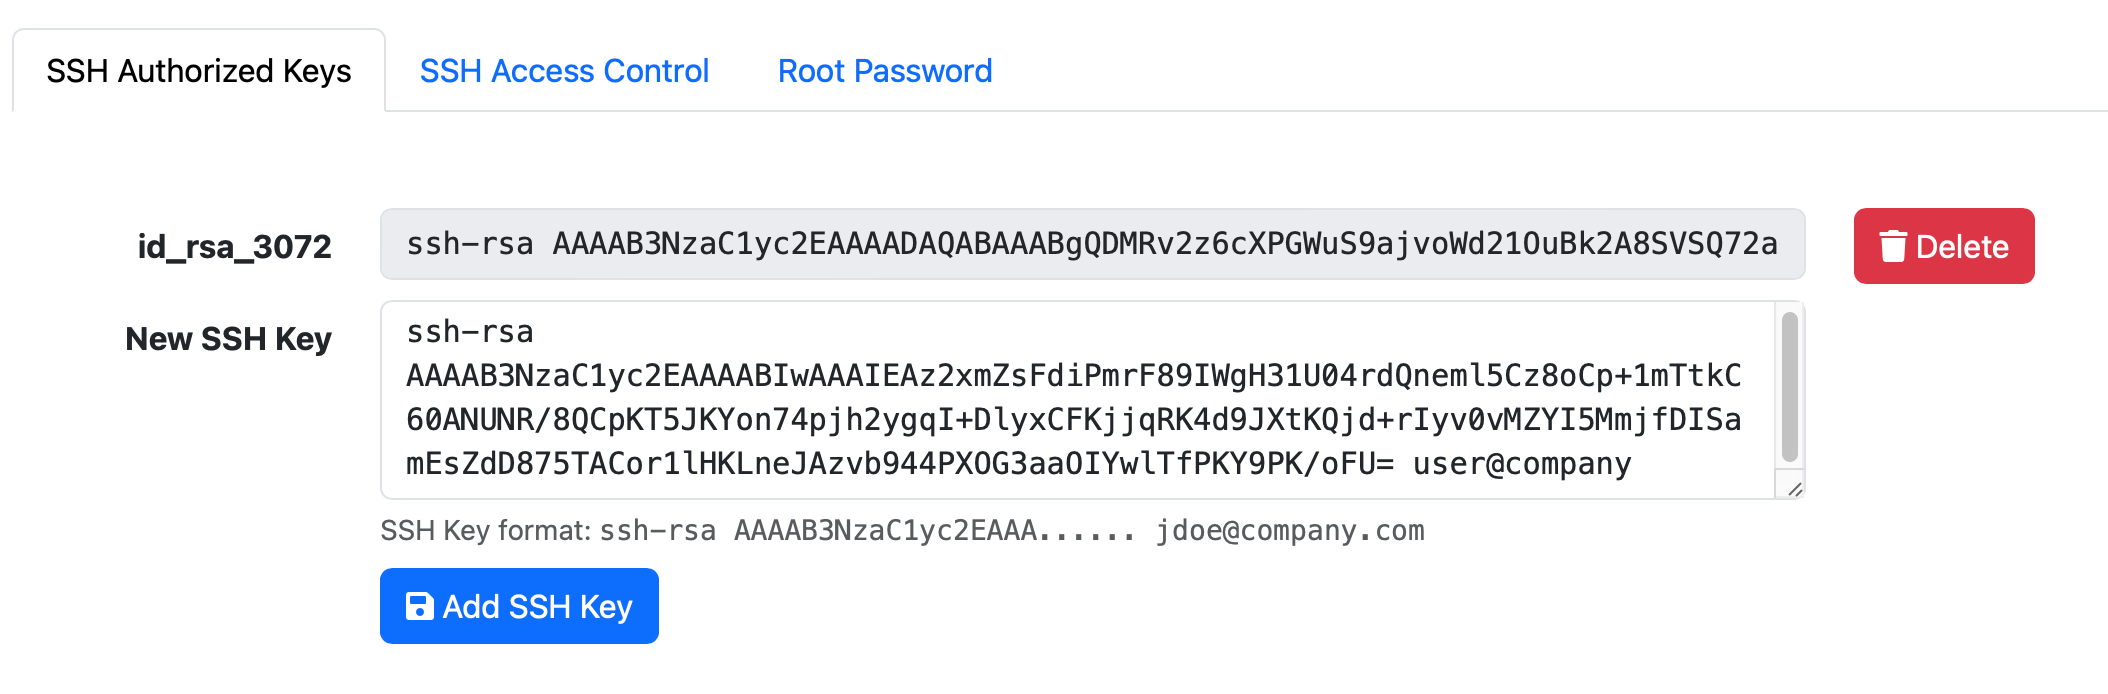
All of the SSH Keys added here will be able to login using SSH to the liquidfiles account.
Generating SSH Keys in Windows
If you don't know how to generate your own SSH Keys in Windows, you can use puttygen.exe that's part of the Putty SSH Client we used in the example above.
When you click Generate in the puttygen.exe window, it will look similar to this screenshot:
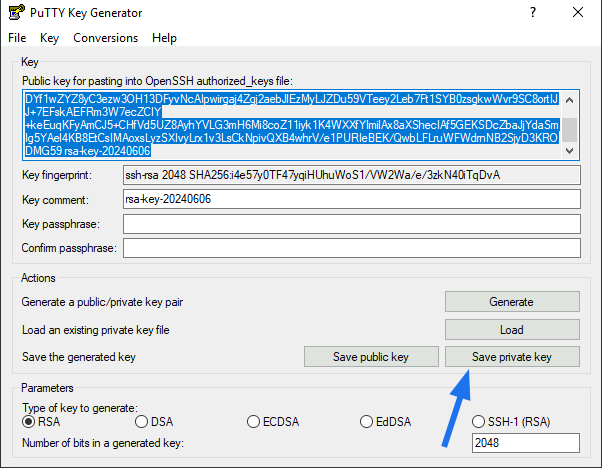
The Public key shown in the Key Generator you can copy to the clipboard and paste to add in the Admin → System → Console Access → SSH authorized Keys tab on the LF server (see screenshot in the SSH Keys section).
The Private Key (PPK) needs to be stored somewhere where you can add it in the Putty Configuration as shown above.
SSH Access Control
If you wish to limit SSH Logins to certain hosts and networks, please go to Admin → System → Console Access. You'll see the following screen:
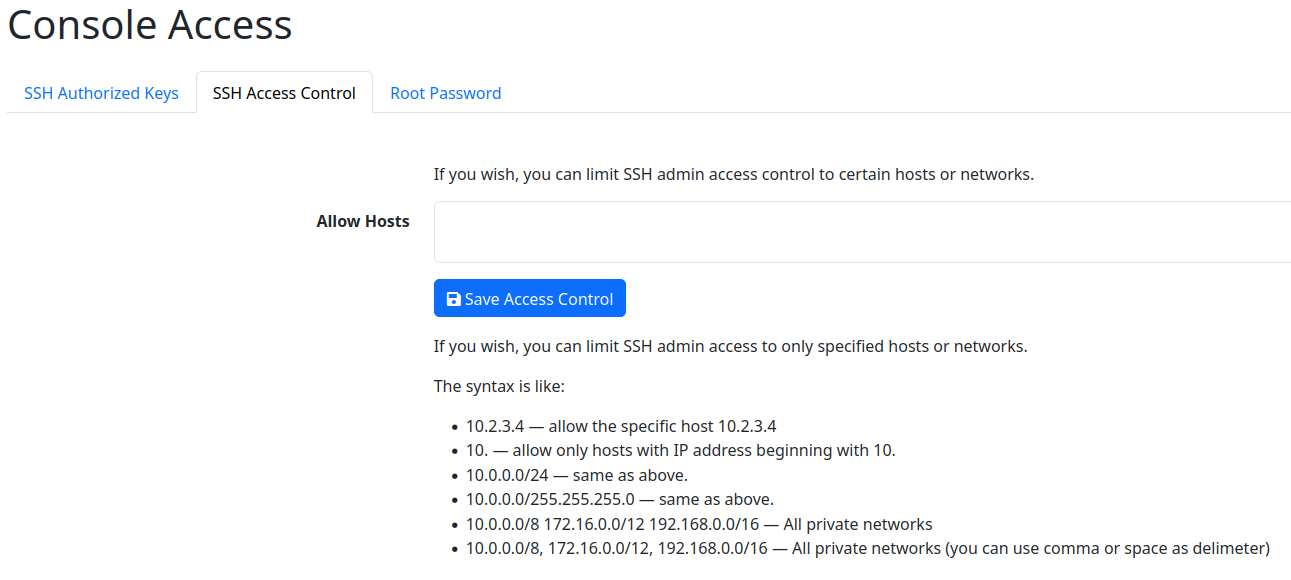
As per the screenshot, you can limit logins to this LiquidFiles system from certain hosts, ip addresses or networks. This is very useful if you have a general open network and all admin PC's on a specific network.