Migrating to a New Server — Restore from a backup
This guide will walk through how to migrate a LiquidFiles system from an existing system to a newly installed system using a LiquidFiles backup file. We call the existing system the source system and the new system the destination system.
Backup the Existing System
If you have period backups, you can use one of those to restore this system from, or you can create a new backup specifically for this. Please login to the System Console and run the command ft backup
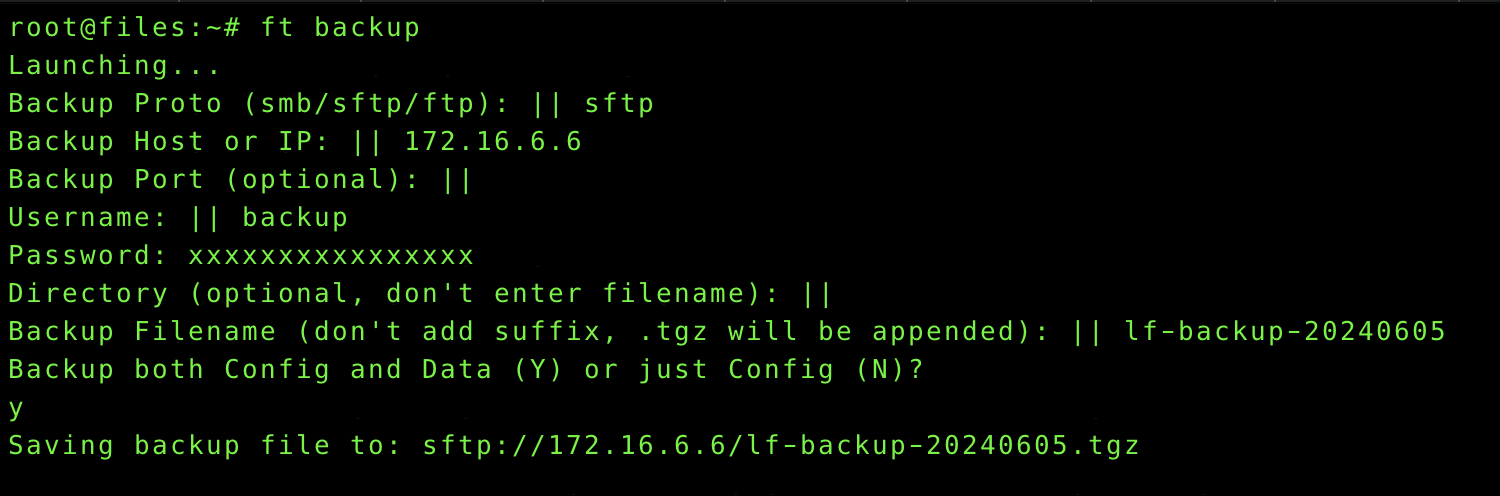
The important thing to note here is that you will need a Config and Data backup. You cannot restore a LiquidFiles system using a configuration only backup.
Installing the new system
Please follow any of the Installation Guides to install a new LiquidFiles system in your environment.
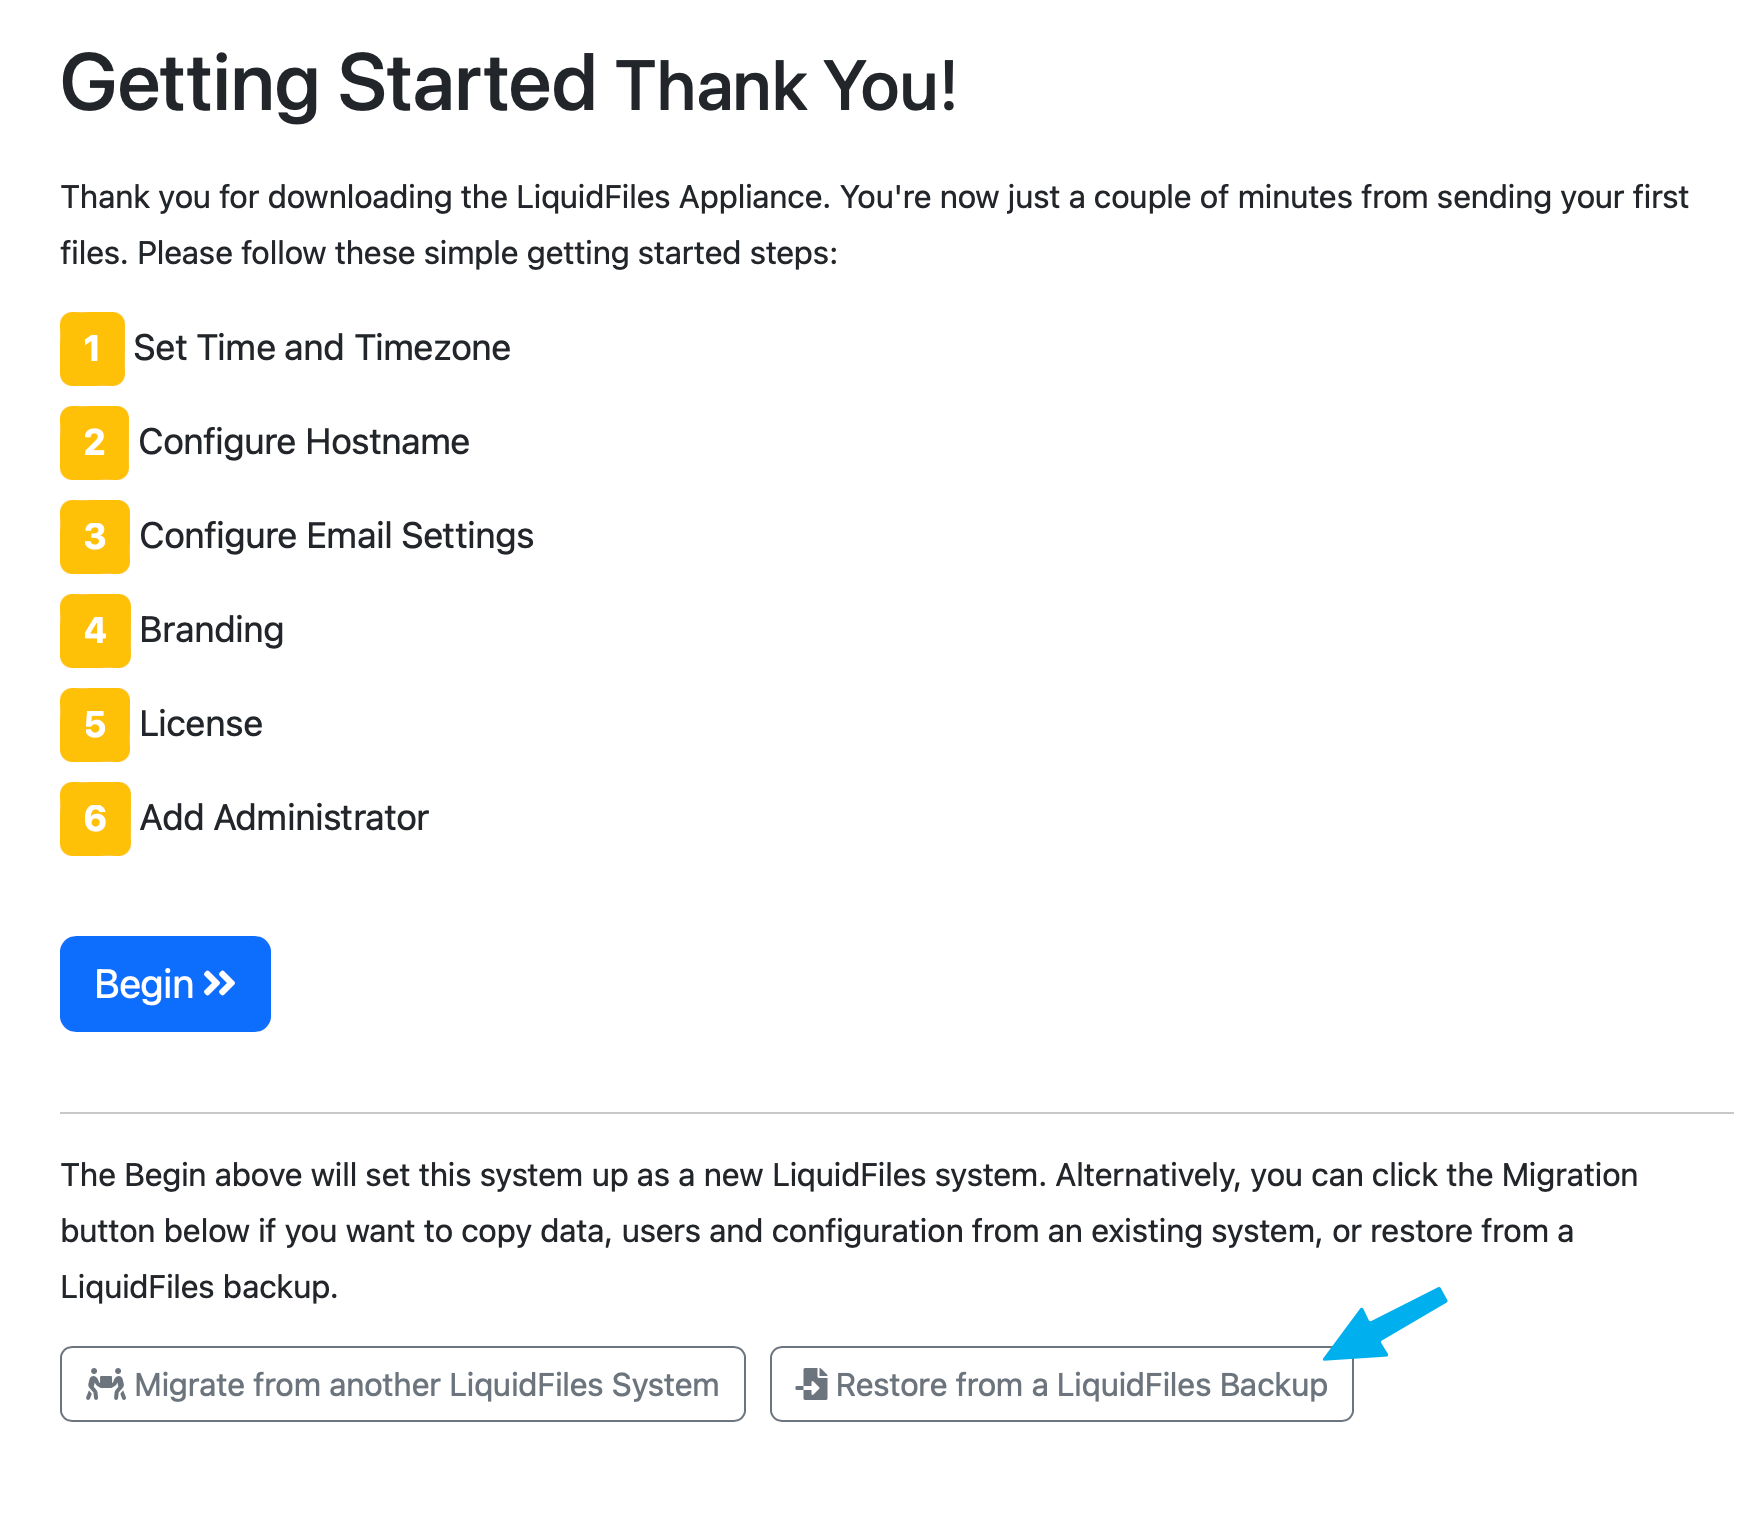
Restore using Web configuration
When you get to the Getting Started Page, you'll see the following where you can initiate the restore procedure. This is the simplest and most convenient option.
This will take you to a Restore Configuration page where you can enter the backup configuration you want to restore this LiquidFiles from.
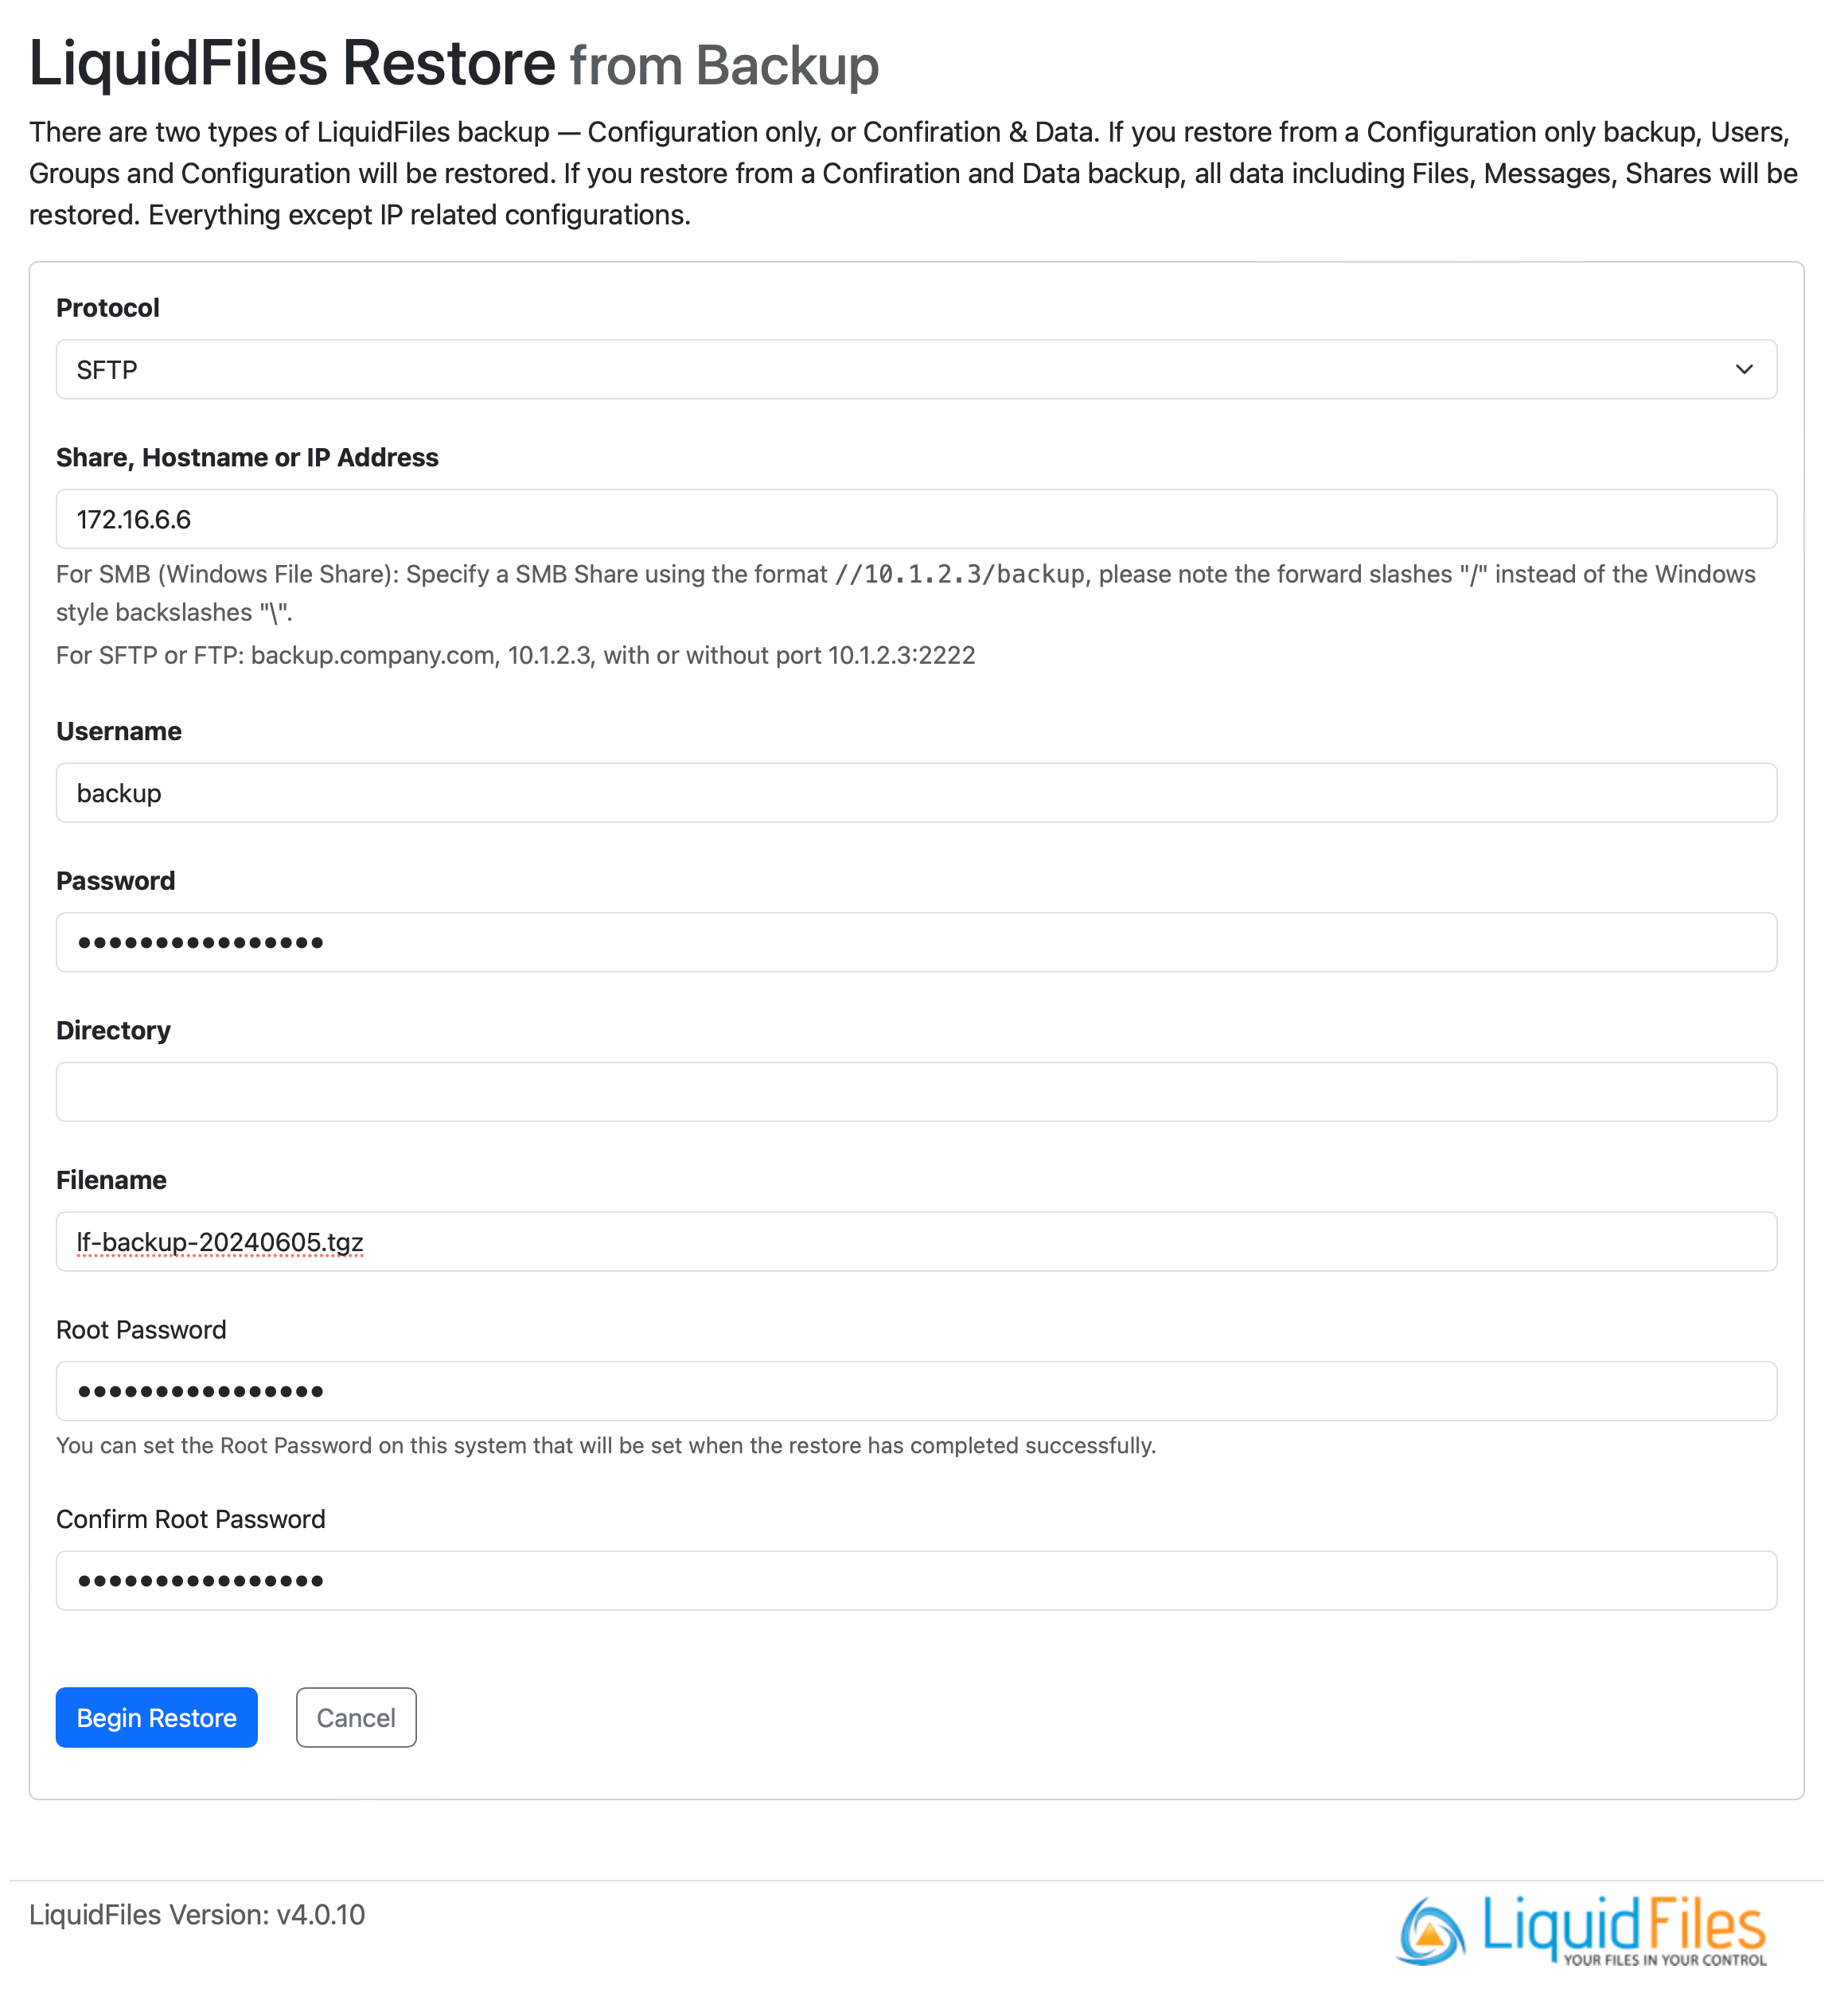
When you hit Begin Restore you'll see a bunch of output as the system restores the configuration and data from the backup. Once completed you will be prompted to continue and the system will now be restored using the data from the backup file.
Restore using the Console
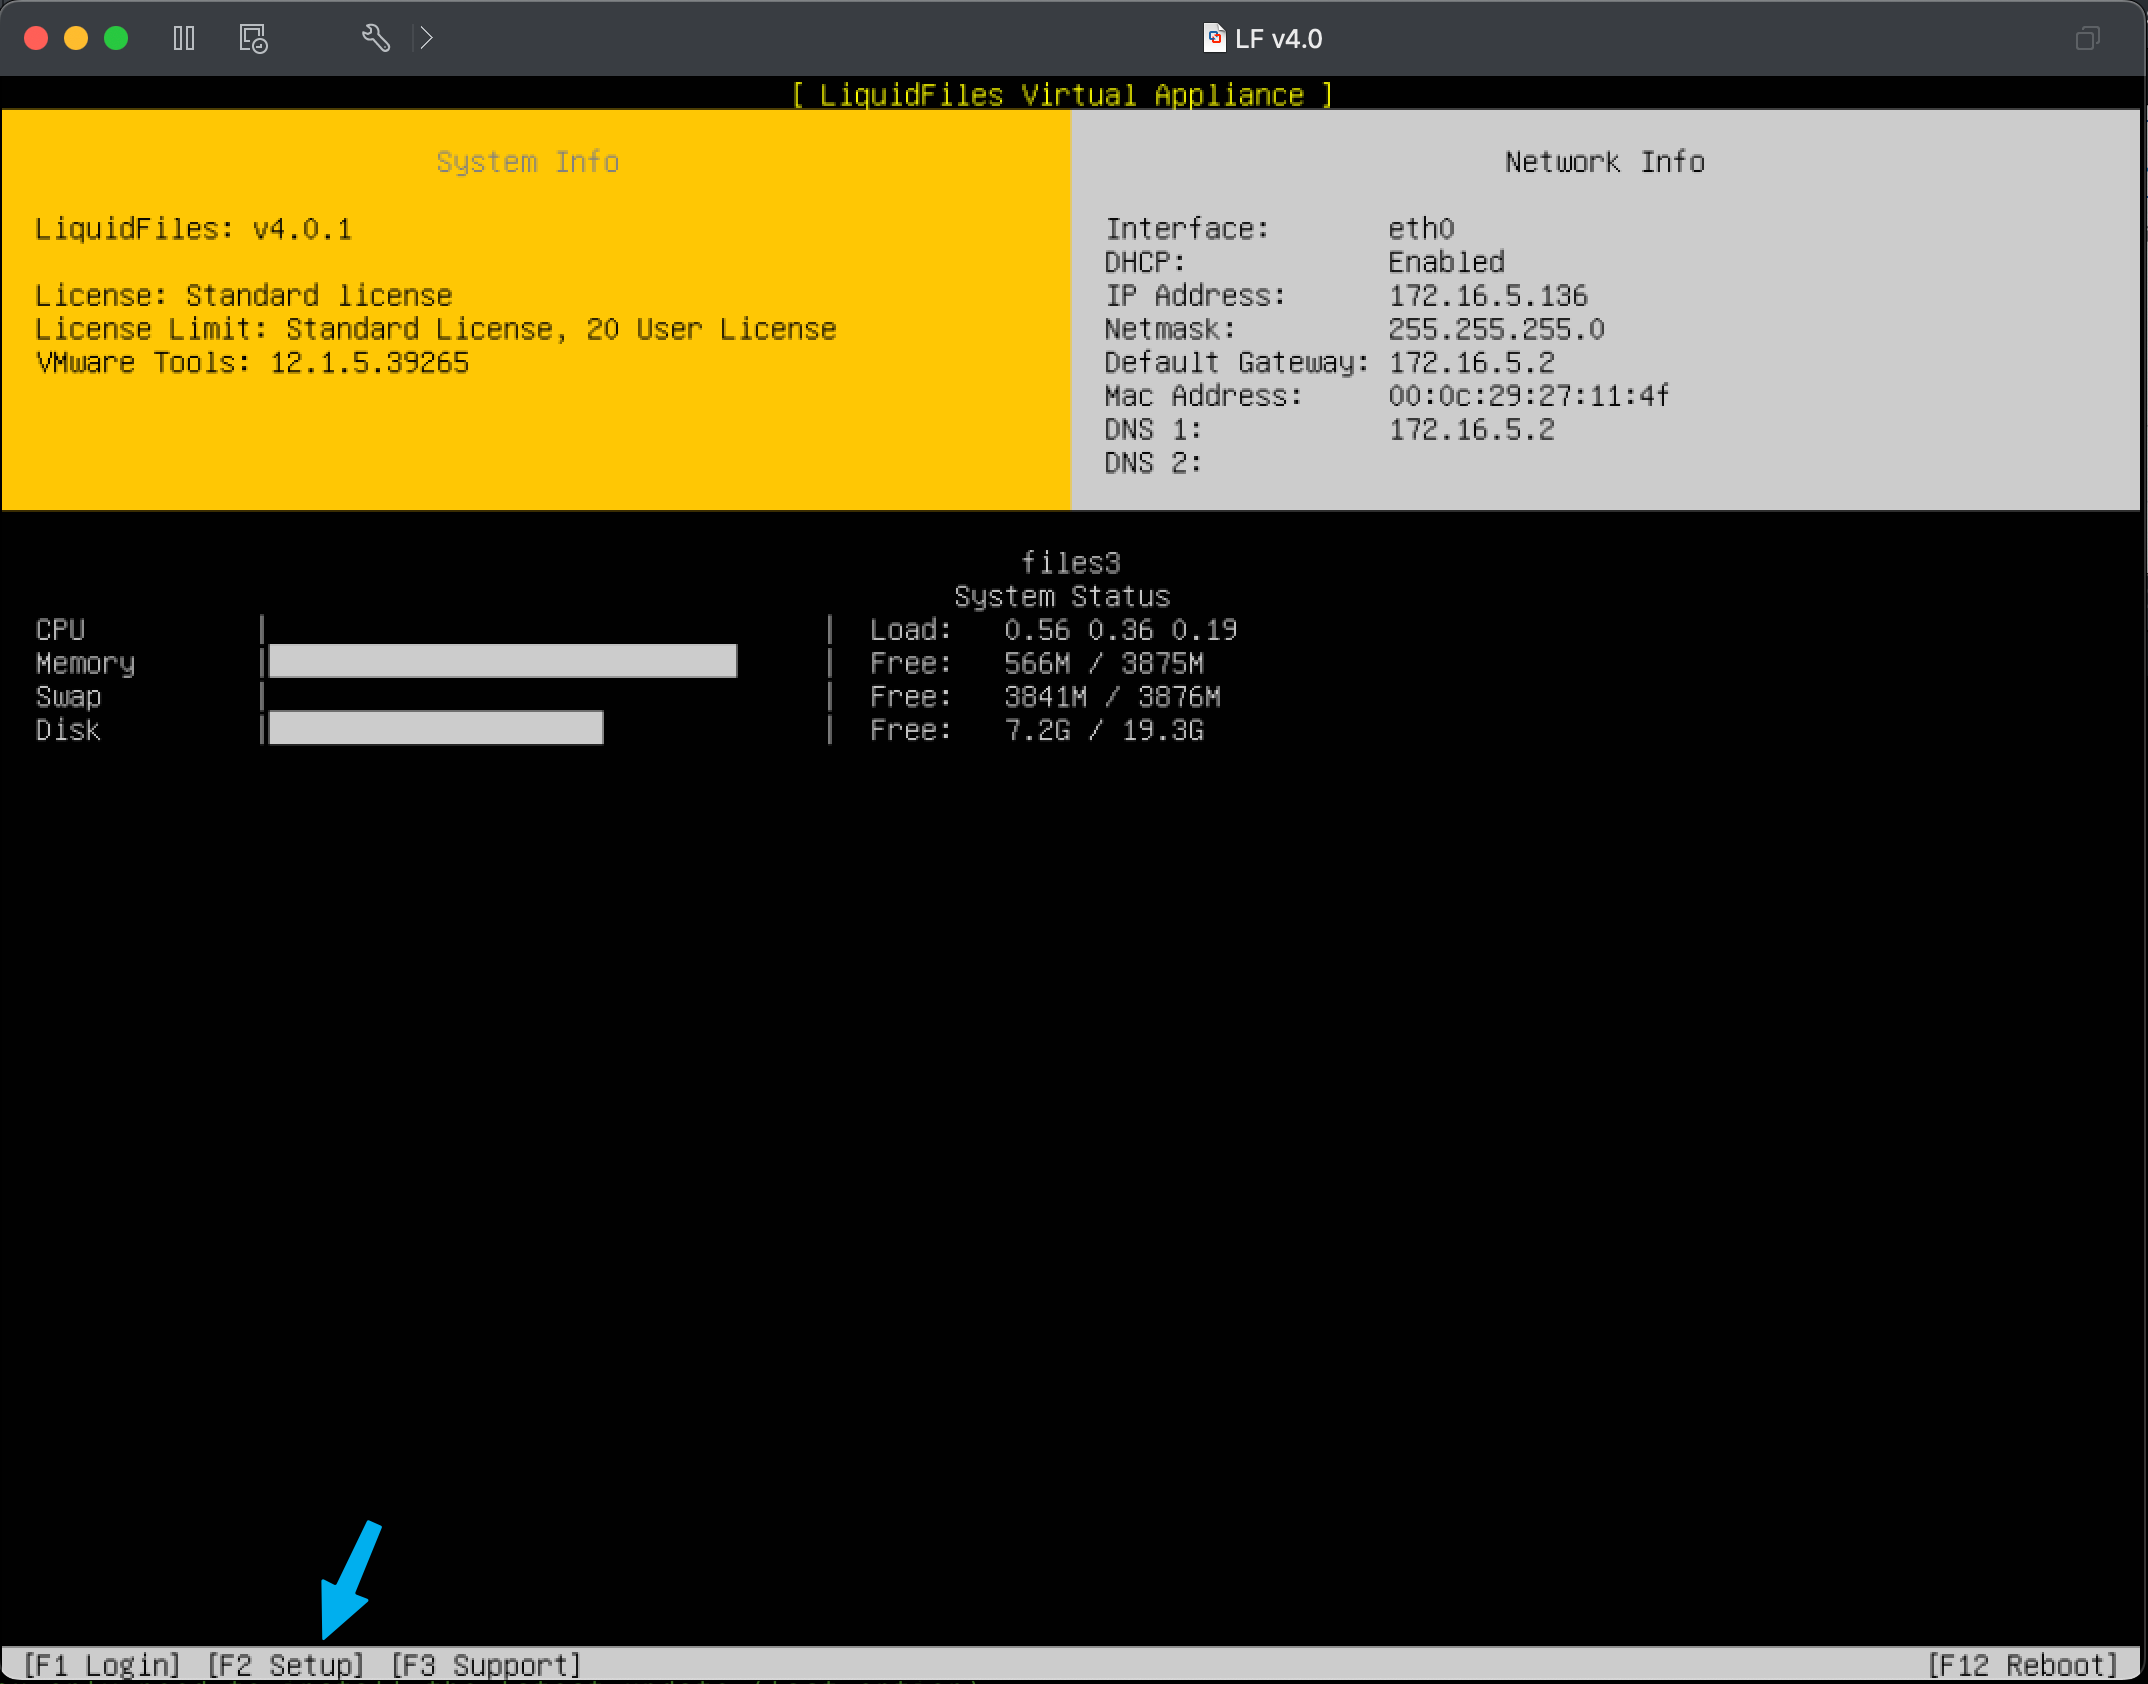
If you have access to the console, you can initiate the restore on a freshly installed system there by hitting F2 to get to the Setup Menu.
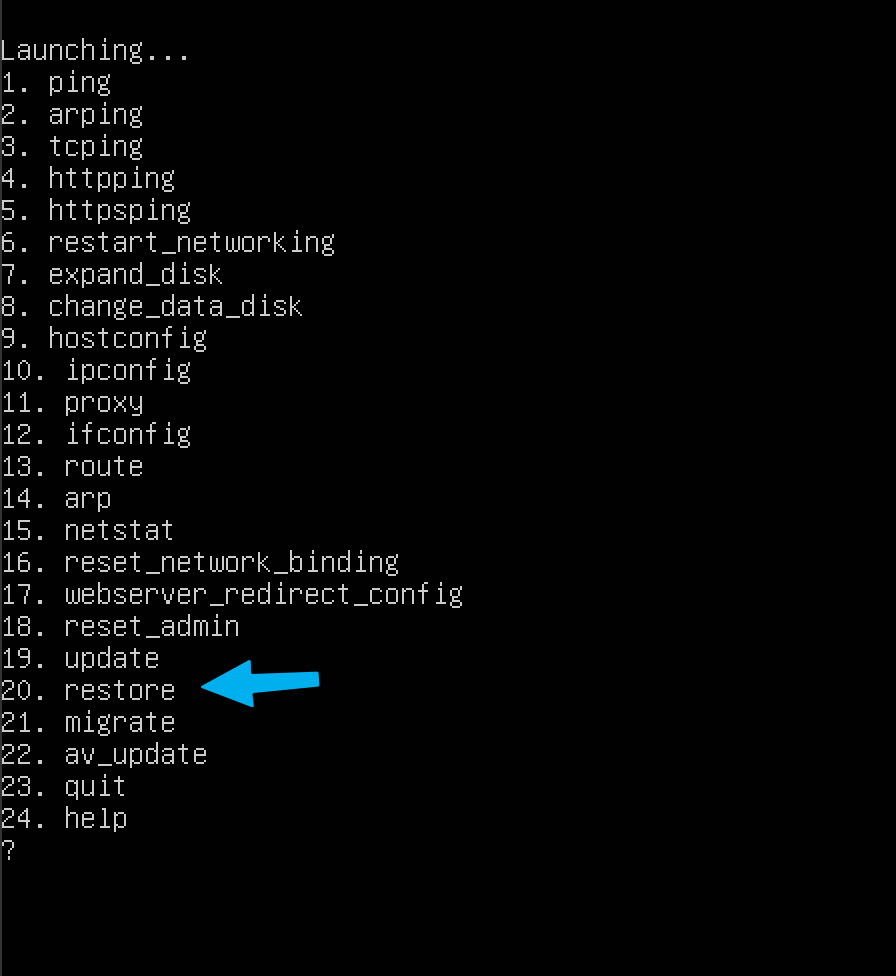
If you have already gone through the Getting Started procedure, you won't be able to run the Restore from the Setup Menu on the console, and the procedure is identical to logging in to the console and run the command ft restore.
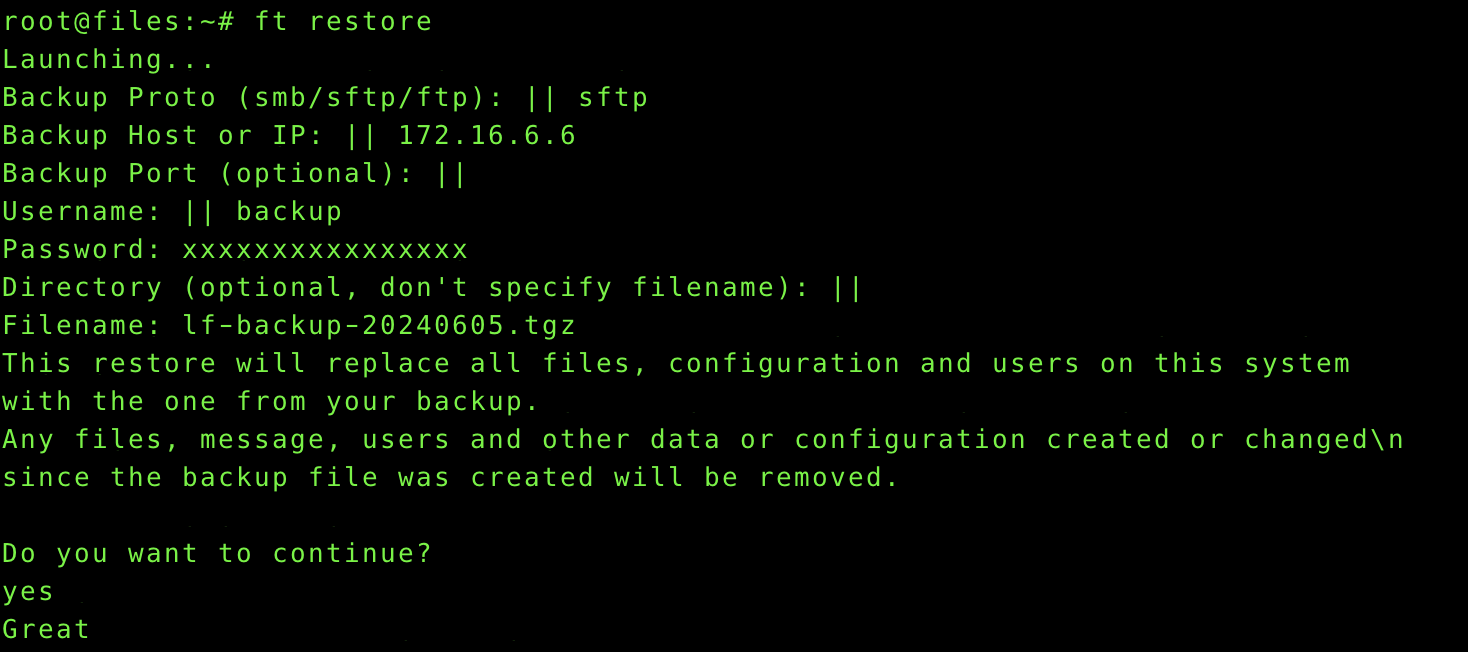
At this point the backup file will be downloaded and the system restored.
Testing & Troubleshooting
When the system come back online after the restore, you should be able to login with the sysadmin account you configured or created.
Keep the Public Hostname the same
If the source system is still online, please make sure to keep the Public Hostname the same when you're testing the restore procedure, before the Production Change-Over, please make sure you keep the Public Hostname the same on the source and destination system. The license is tied to the Public Hostname. If you change this on the destination system, the source system will get an invalid license error and stop working properly.
If you want to change the Public Hostname, please do that after you've decommissioned the old source system.
Common Issues
If there's any issues, it's usually one of two different issues we've seen.
Cannot authenticate with sysadmin account?
If you didn't create a locally authenticated sysadmin account, and the new destination system can't authenticate (because you cannot reach the LDAP server or similar). Please login to the System Console and run the command ft add_admin to create a new locally authenticated sysadmin account, or ft reset_admin to reset the first sysadmin account on the system.
You get redirected to the source system?
It's possible to configure LiquidFiles with strict hostname validation. If your Public Hostname is https://files.company.com, with strict hostname validation you will get redirected to this hostname. If you haven't done the Production Change-Over, this will redirect you to the source system.
You can disable this strict hostname validation by logging in to the System Console and run the command ft hostconfig. You will be asked a few configuration question. The important one in this instance is the strict hostname validation that needs to be disabled.
Production Change-Over
When you have completed the migration, the destination system will be identical to the source system when it comes to any LiquidFiles related data such as users, groups, configuration, messages, data, ...
When you're ready to change over the source and destination system, making the destination system the new production system, there are three basic options. Each of these options are outlined in the Migration Overview guide.