Changing Hostname or Domain in LiquidFiles
This article outlines how to change Hostname or Domain in LiquidFiles.
License Considerations
Your LiquidFiles license is tied to your Public Hostname. The license requirement is that each LiquidFiles system requires its own license. You cannot have two systems https://lf1.company.com and https://lf2.company.com, or https://liquidfiles.domain1.com and https://liquidfiles.domain2.com using the same license.
But, the hostname or domain is not strictly locked to the license. If you change the hostname or domain, as long as your LiquidFiles system can contact the LiquidFiles license server https://license.liquidfiles.com, it will automatically the license with the new hostname or domain.
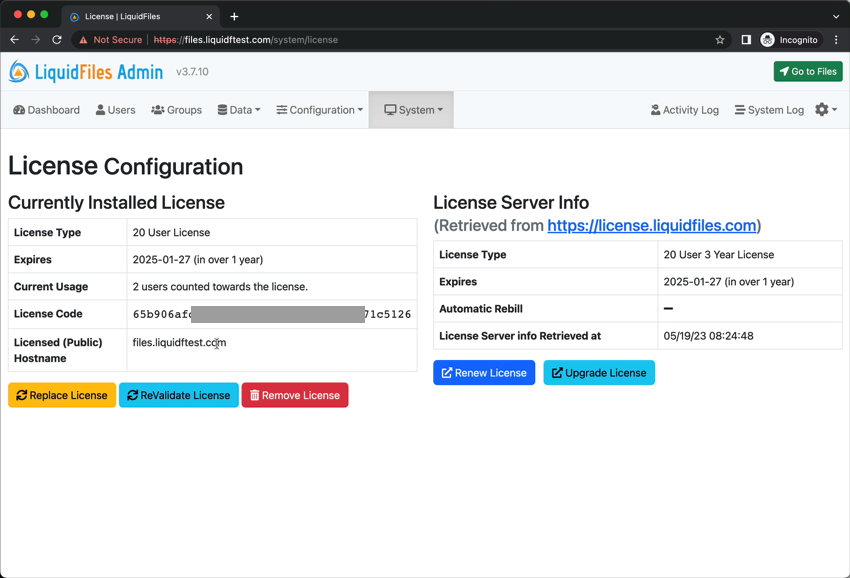
Example Change Hostname/Update License
In the following example you'll see that changing the hostname will automatically update the license server with the new name. Also, from a LiquidFiles license perspective, it doesn't matter if you change hostname or domain.
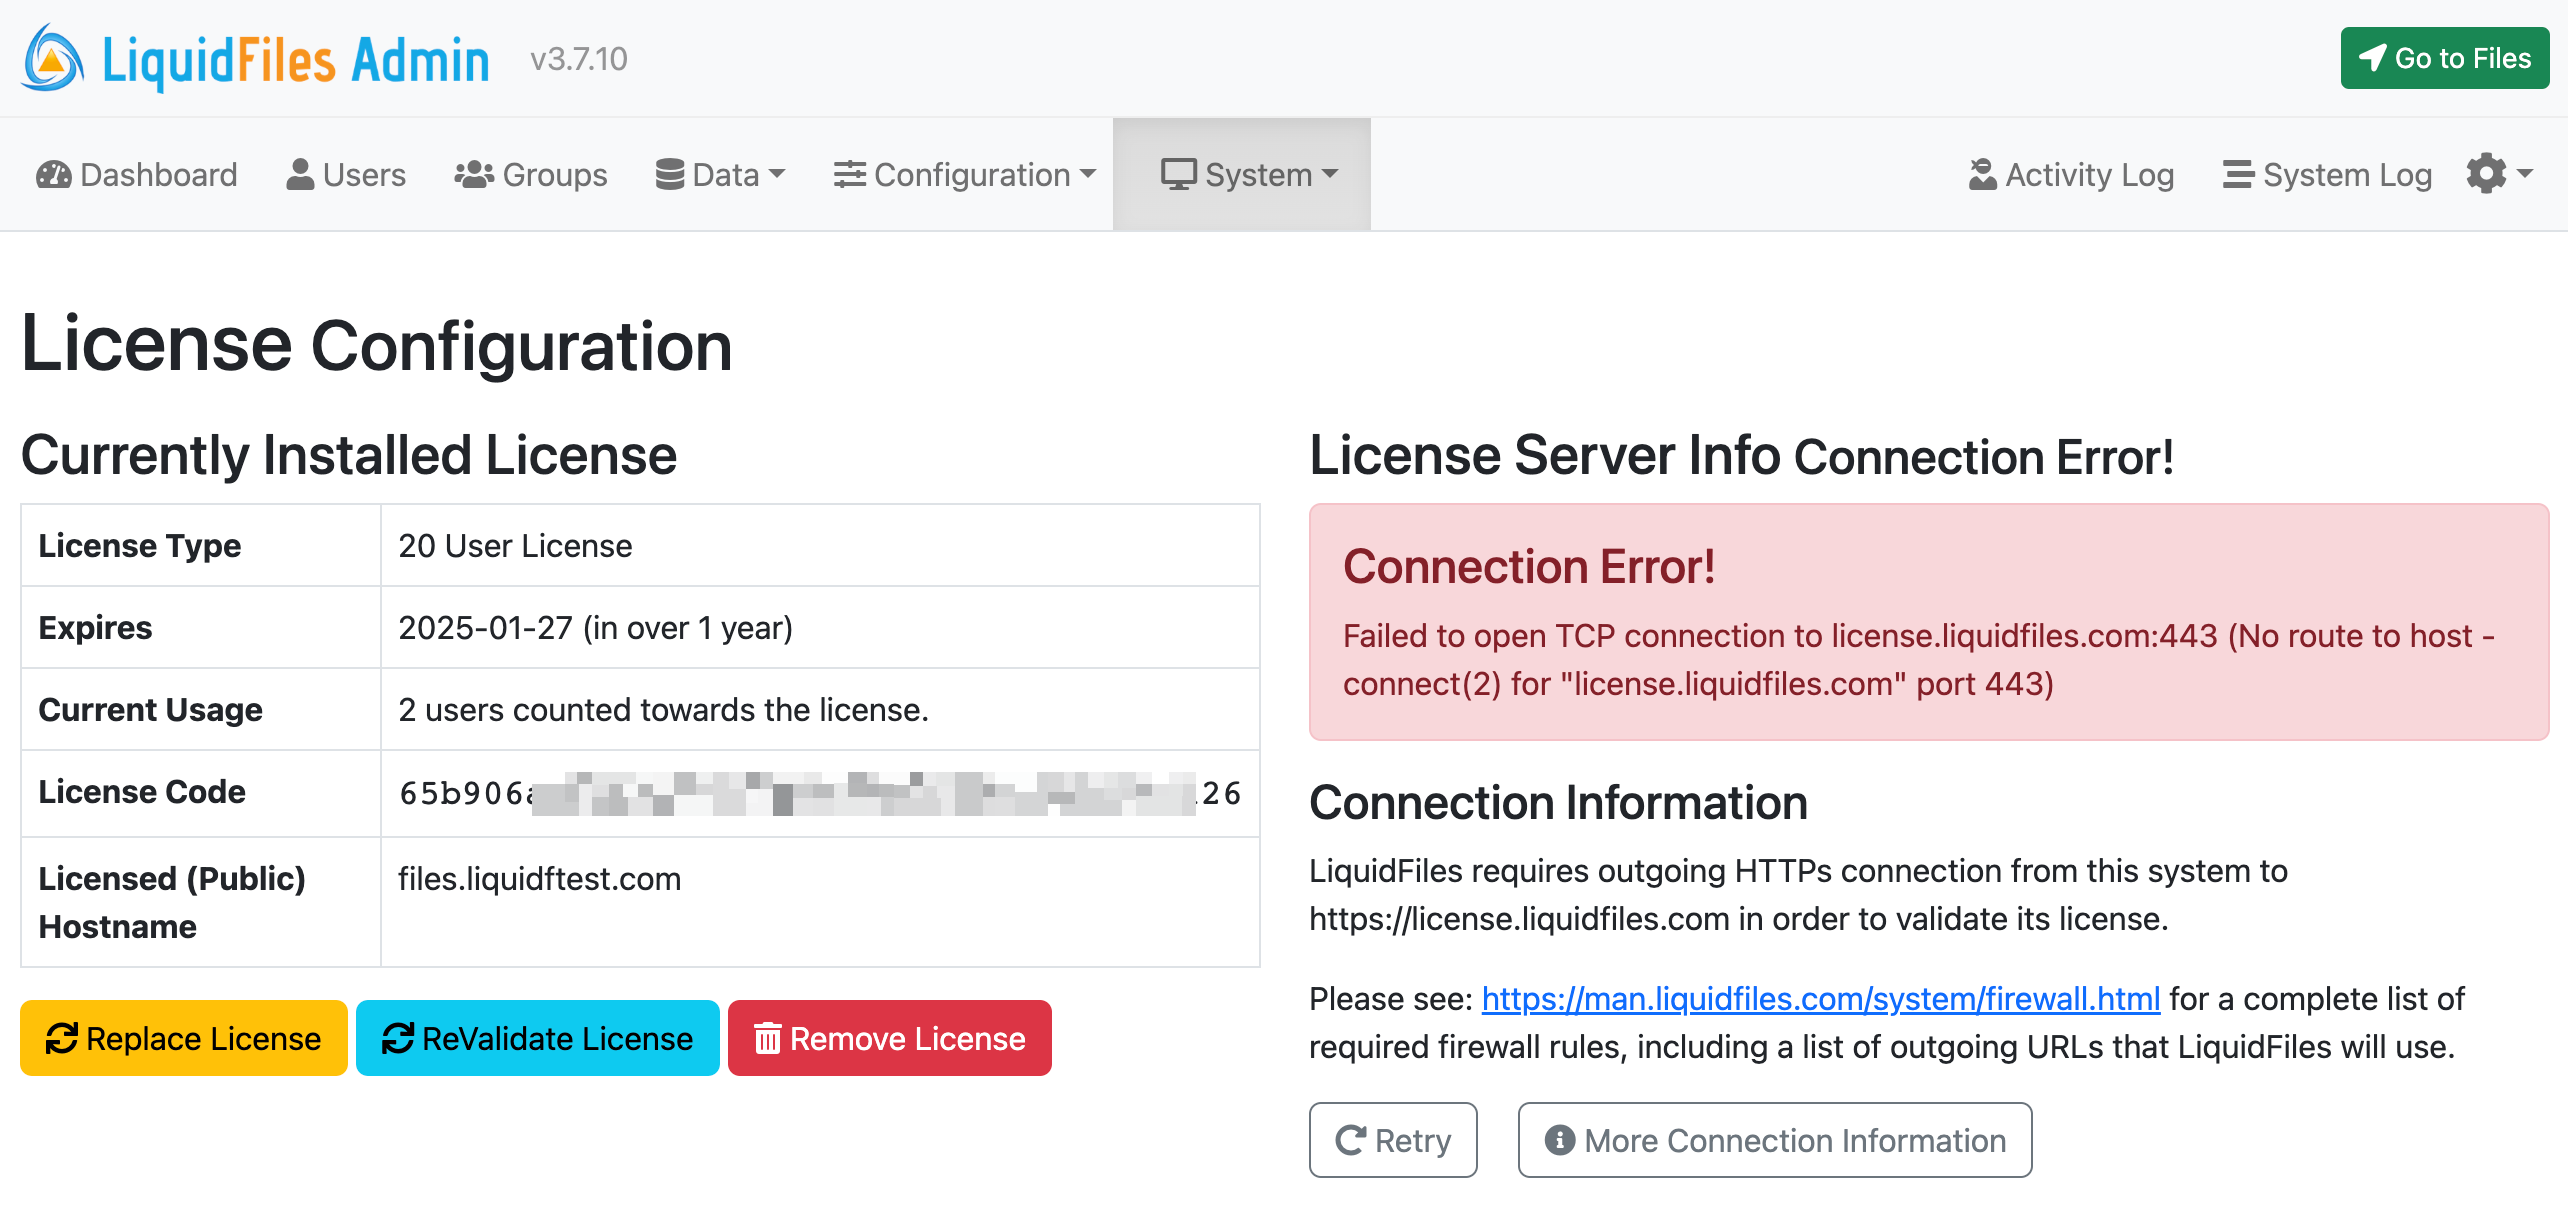
If you see a Connection Error similar to the following screenshot, you will need to update your environment to permit connections to https://license.liquidfiles.com. Please see the Network and Firewall connections article for more information.
Changing Public Hostname
Overview
Here's an overview of the steps involved when changing Public Hostname on your LiquidFiles system.
- Add a new A record to your DNS for the new name. We want to add an A record because we'll later change the old hostname to some redirect system or service. If your current hostname is files.old-domain.com → 192.1.2.3, create a new DNS A record that says files.new-domain.com → 192.1.2.3.
- Test that you can open your browser pointing to https://files.new-domain.com. You'll probably want to do this using your browsers privacy/incognito mode as you will deal with invalid certificates and warnings and HSTS may interfere in your normal browsing mode.
- Update the LiquidFiles configuration, changing your Public Hostname to files.new-domain.com.
- Replace the certificate with a new certificate that is valid for https://files.new-domain.com.
- Validate in your browser that you can browse to https://files.new-domain.com with no browser warnings.
- Redirect https://files.old-domain.com/* → https://files.new-domain.com/*. This step will involve either configuring your own redirect server or using a redirect service.
Updating the Public Hostname
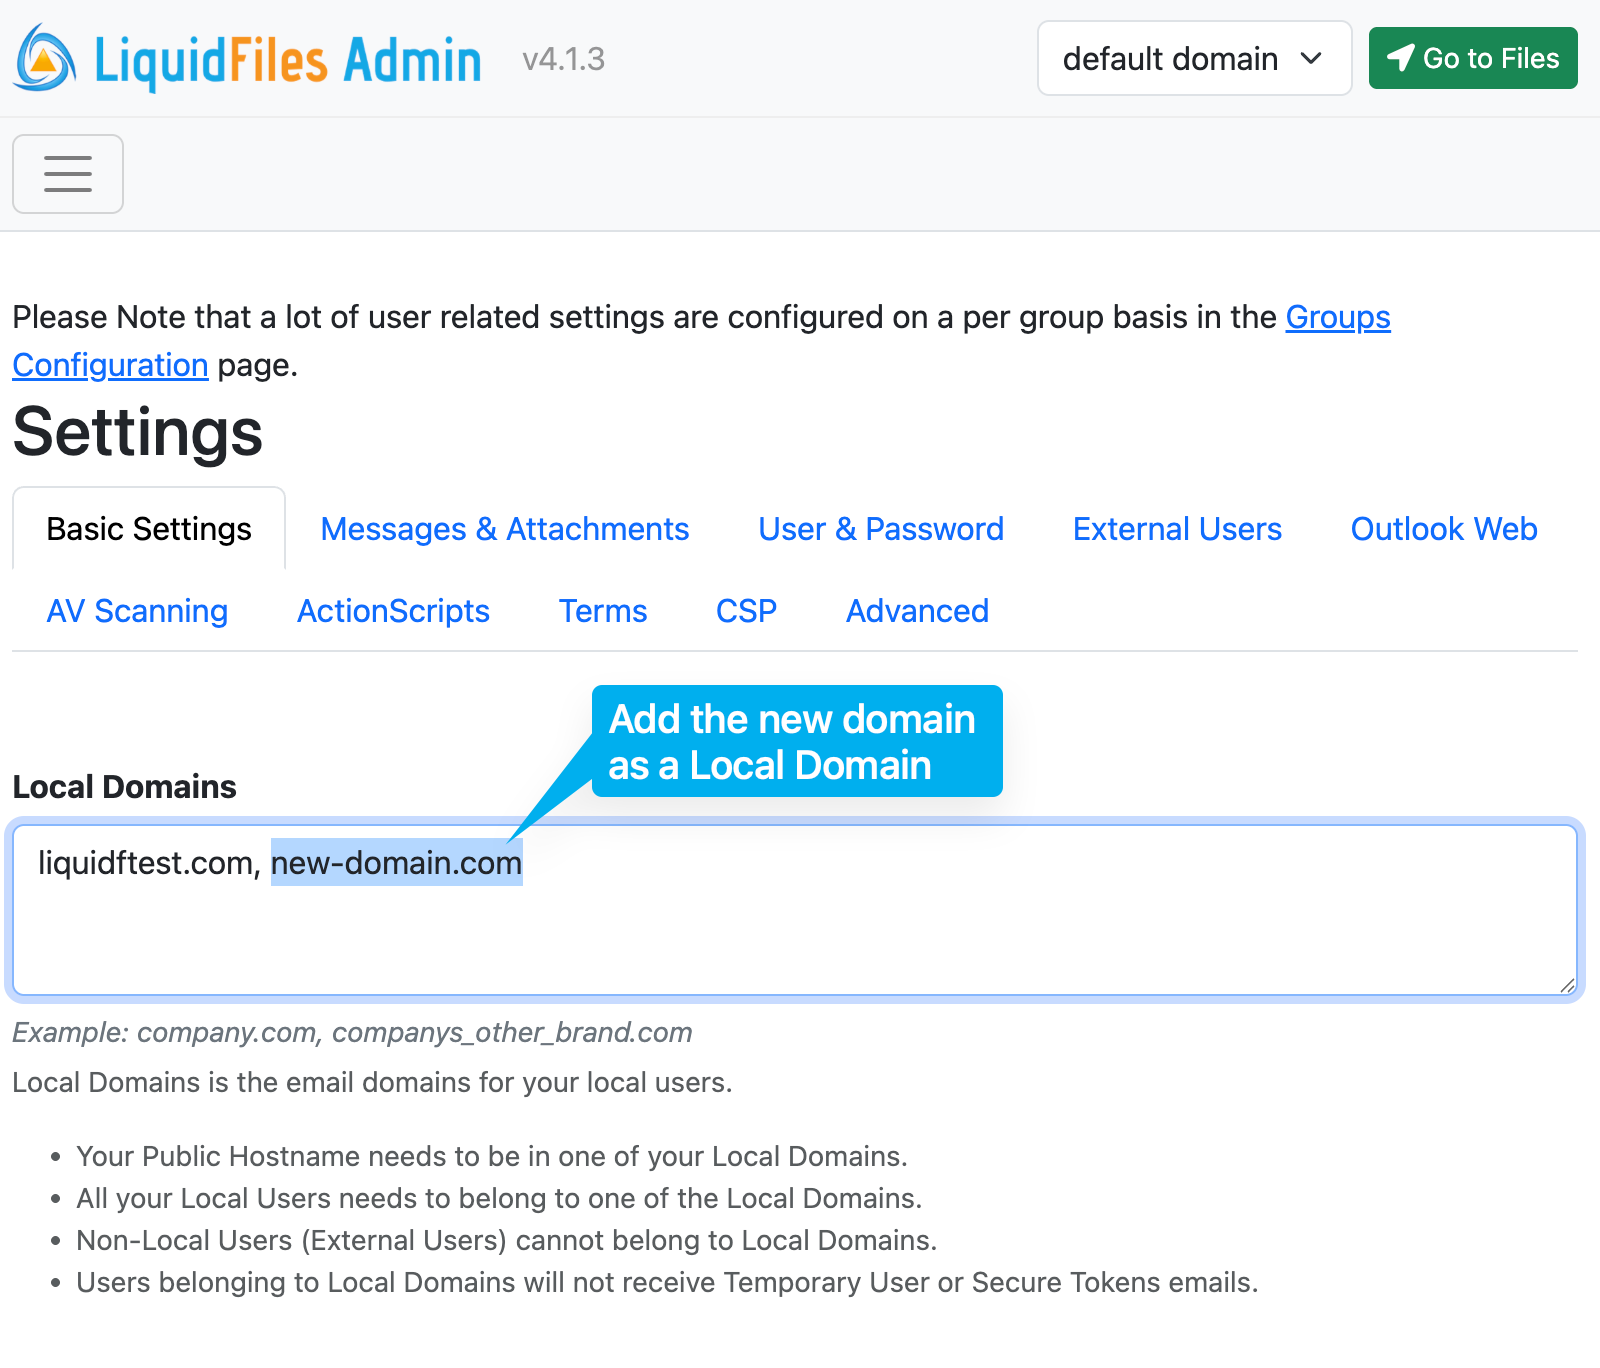
Here we assume that you've completed the first two steps, and that Here we have the configuration on the server https://files.liquidftest.com and we're going to change this to https://files.new-domain.com. In order to make https://files.new-domain.com the Public Hostname for this system, we'll need to add new-domain.com to the list of Local Domains.
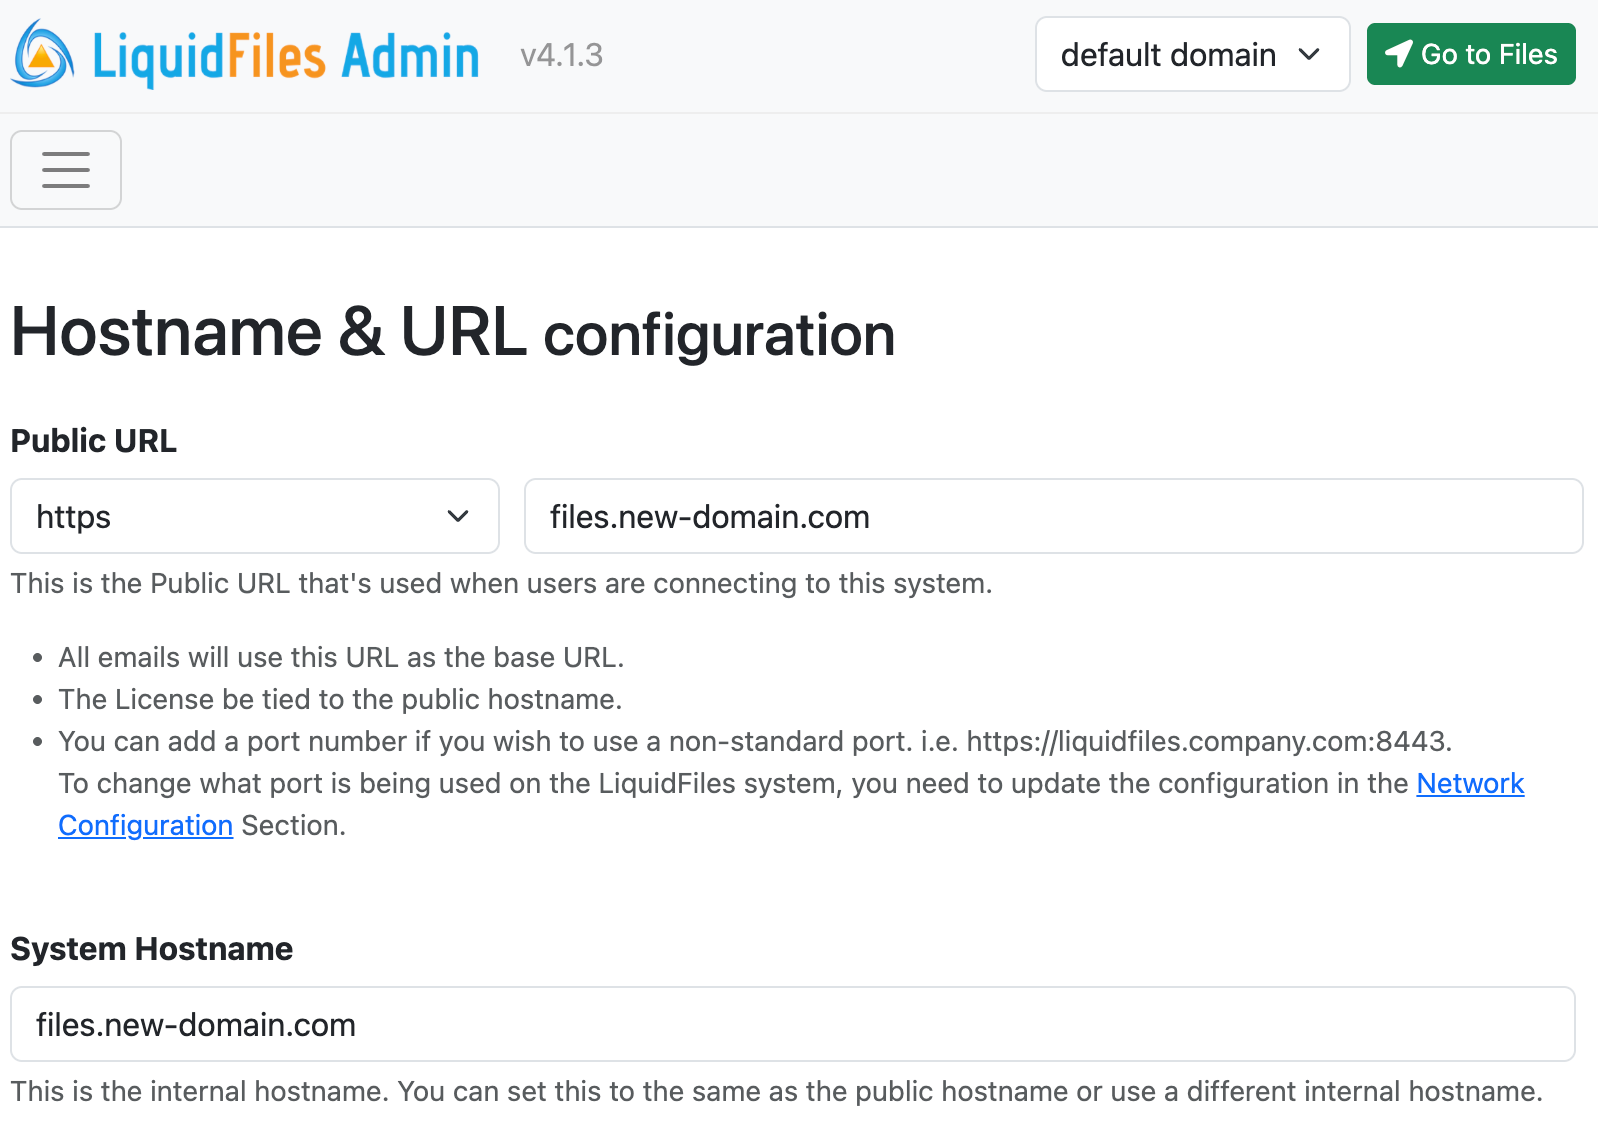
When you've added new-domain.com to the list of Local Domains, you can go to Admin → System → Public Hostname & URL and update the Public Hostname. Also, when changing Public Hostname, because of HSTS you may want to open your browser in privacy/incognito mode to avoid any potential issues.
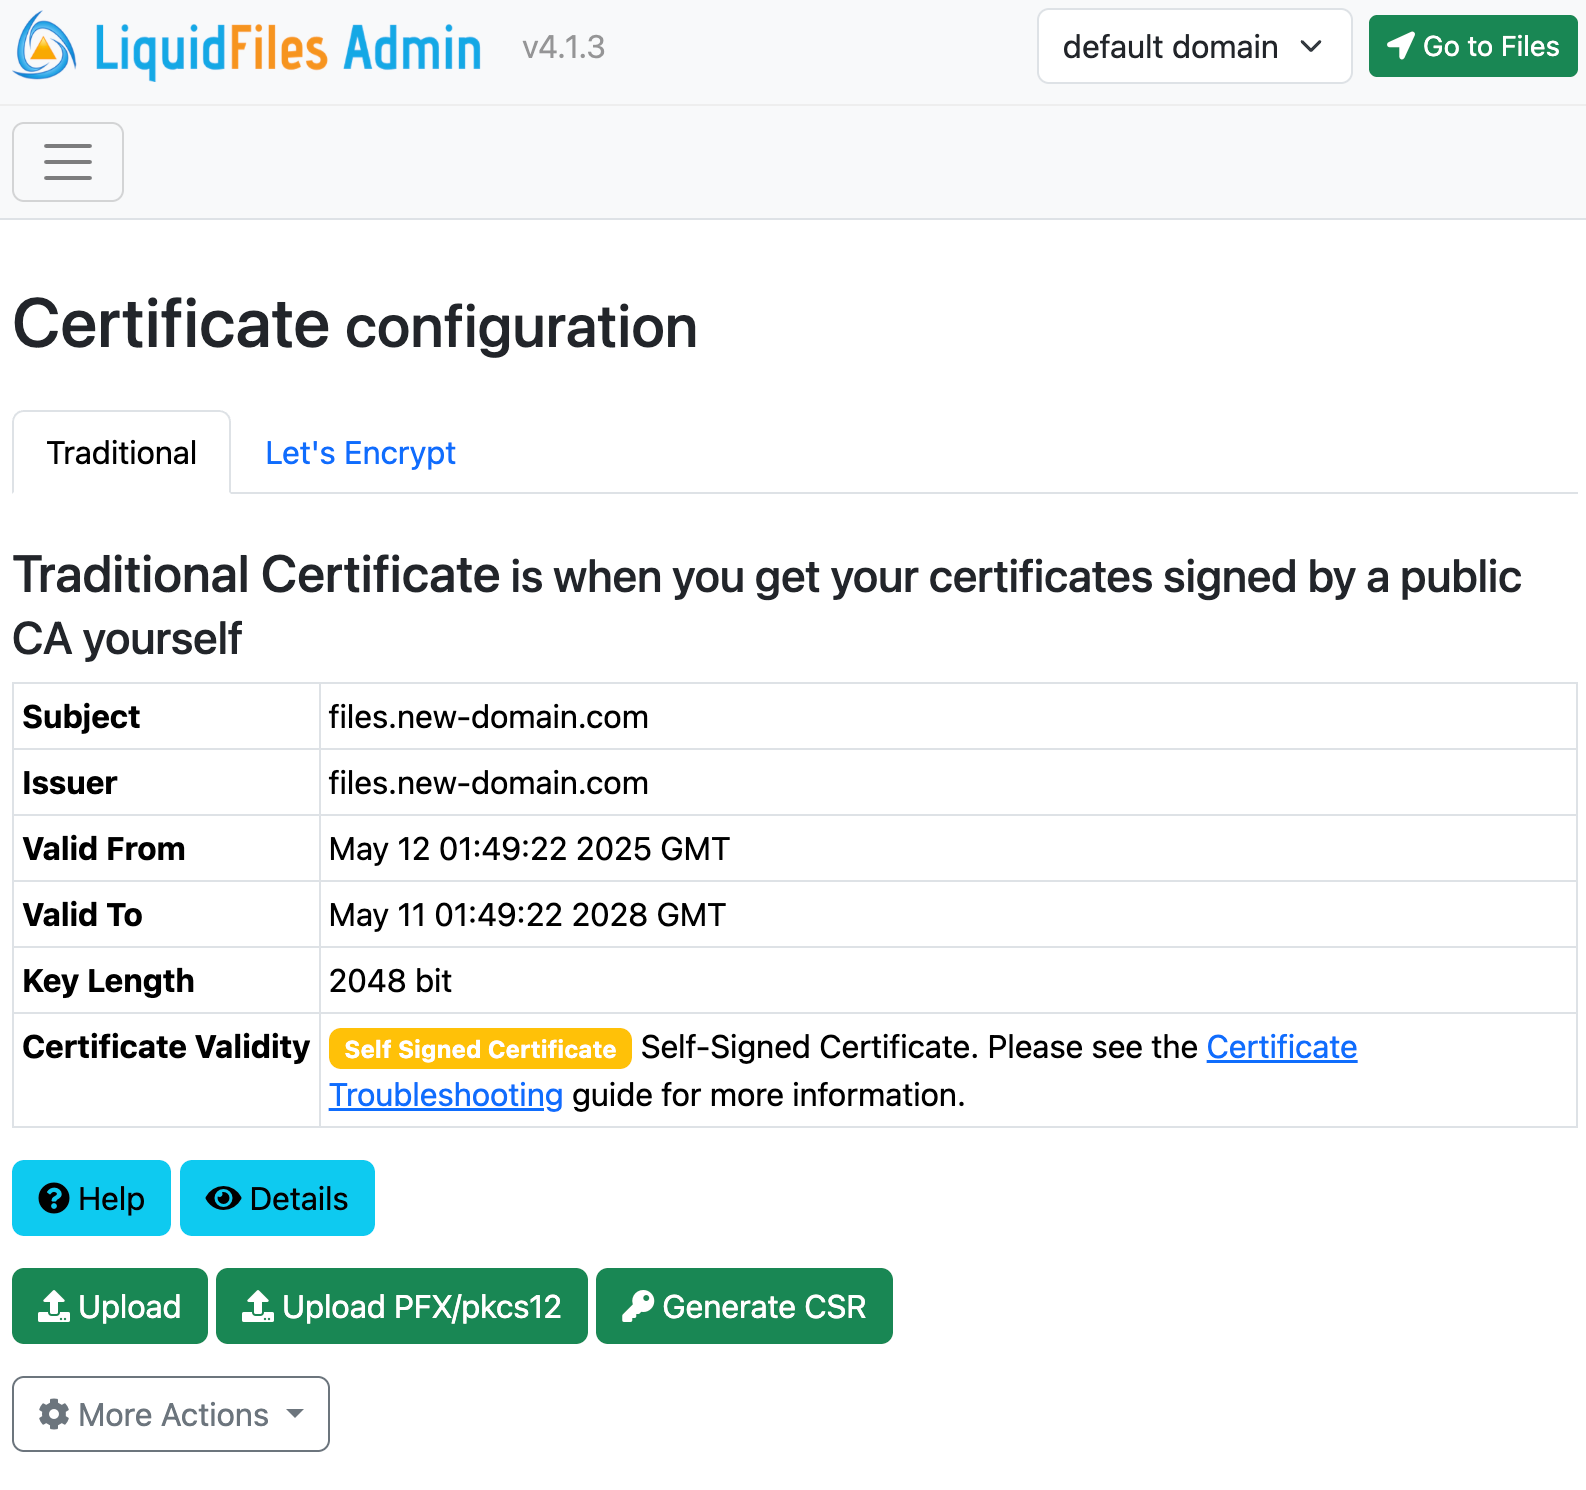
When the Public Hostname has been changed, you will also need to make sure that you have a valid certificate for files.new-domain.com. In the following screenshot you can see that the certificate has been replaced with a new self-signed certificate (will only happen if the previous certificate was self-signed). The actual procedure is identical to installing the certificate in the first place.
Changing Users Domain
At this point, you have updated the Public Hostname and installed a new certificate, and it's time to look at your users. It's likely that all of your users have accounts/emails in your previous domain and you wish to move them over.
To do that in LiquidFiles, we're going to follow a two step process. First, we're going to change the actual users emails. Please go to Admin → System → Bulk Edit.
At the bulk edit page, you can quickly change all of your users email addresses from one domain to another, it will look like the following:
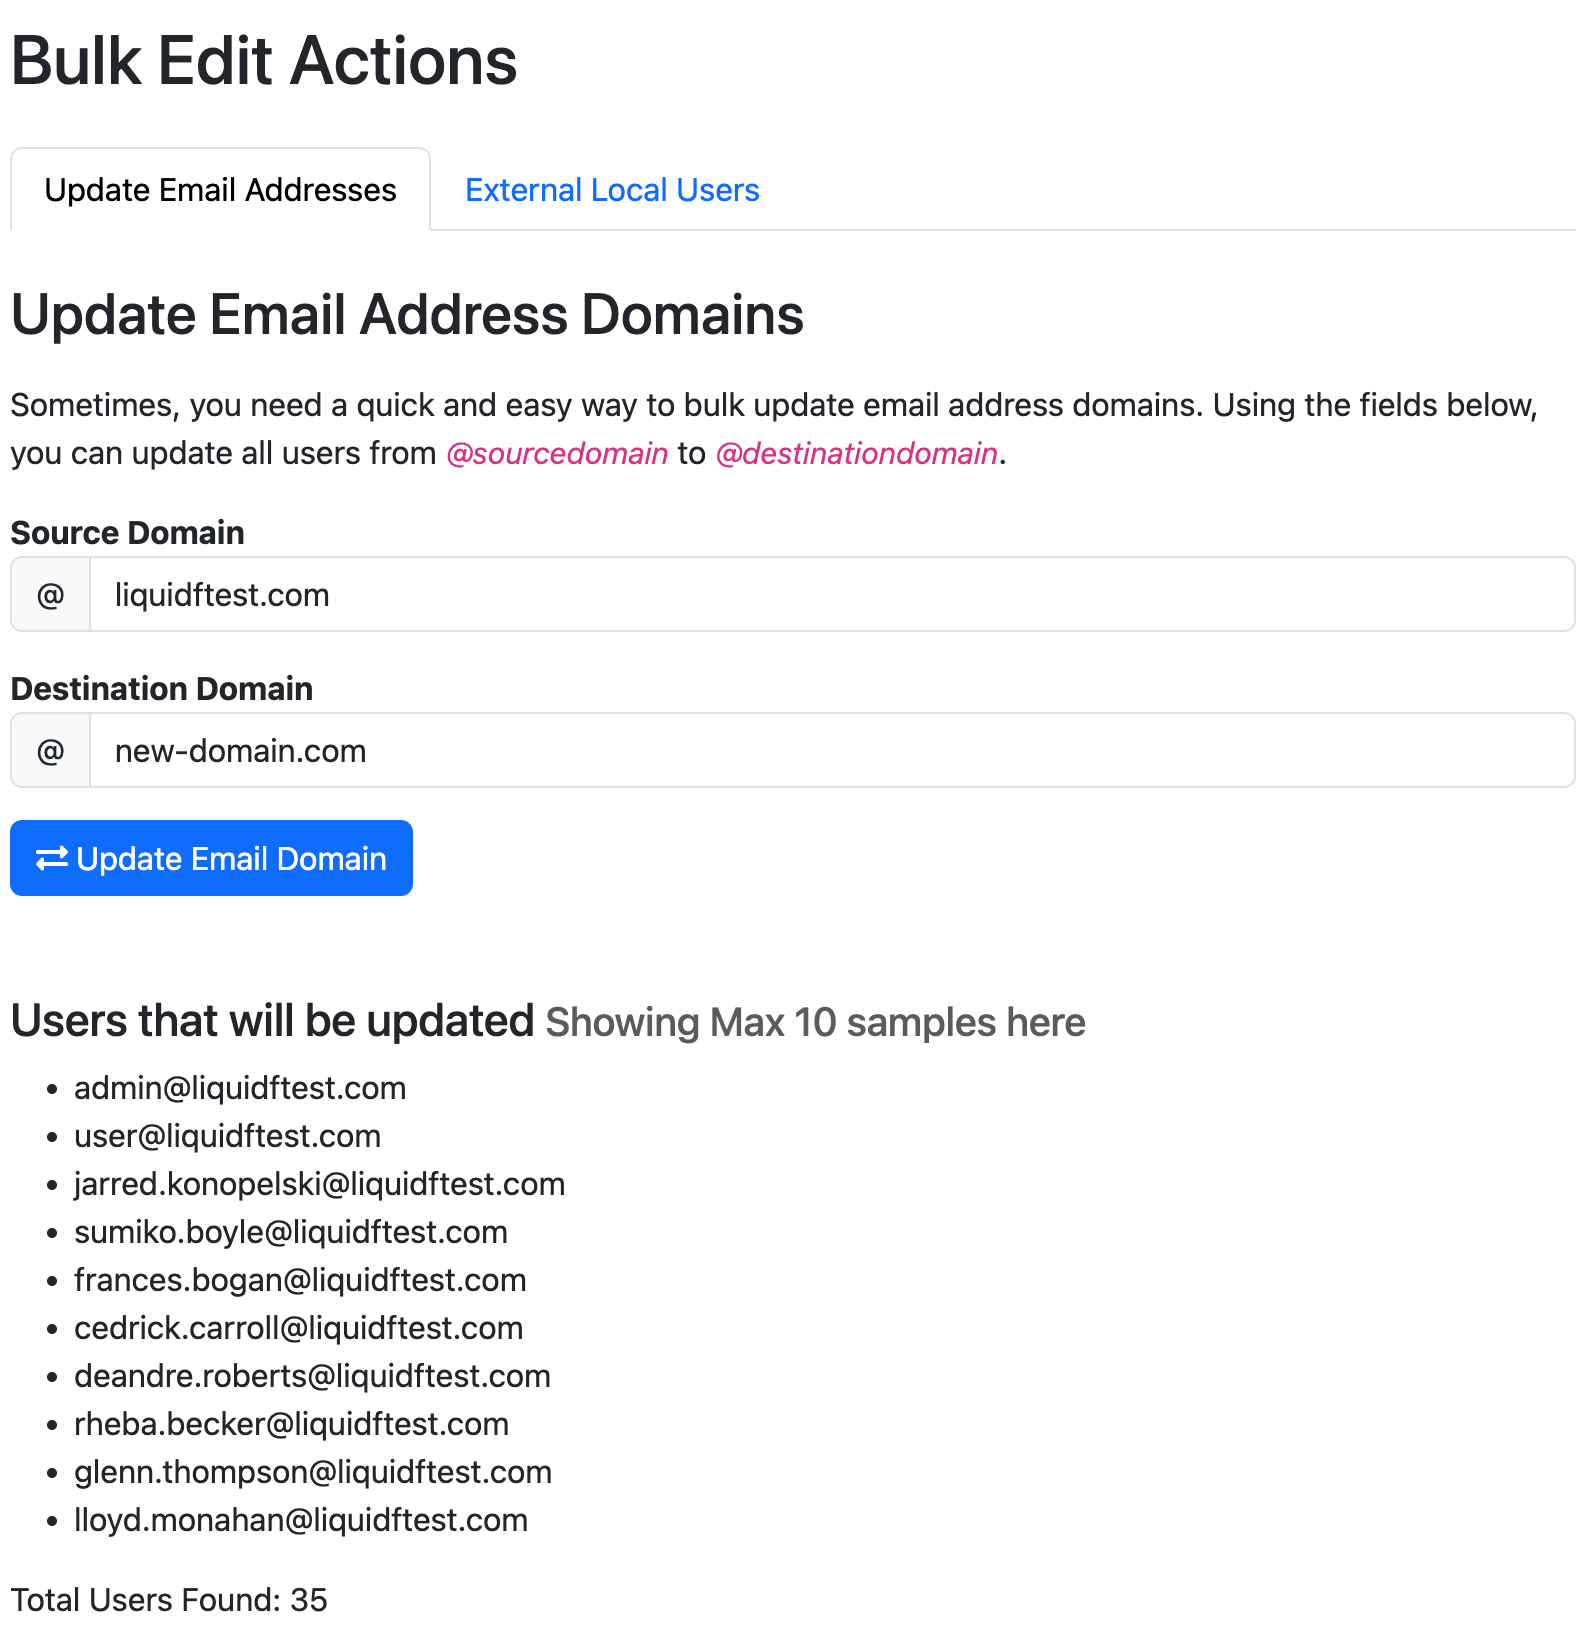
Once completed, all of your users emails will have been updated. But, we have one more step to do. If previously a message was sent to sumiko.boyle@liquidftest.com, from the screenshot above, once her email has been updated to sumiko.boyle@new-domain.com, she will no longer be able to access messages sent to sumiko.boyle@liquidftest.com. She will also no longer be able to login using the account sumiko.boyle@liquidftest.com.
To fix both of these issues, we're going to add an email domain alias, configured in Admin → Configuration → Email Domain Aliases.
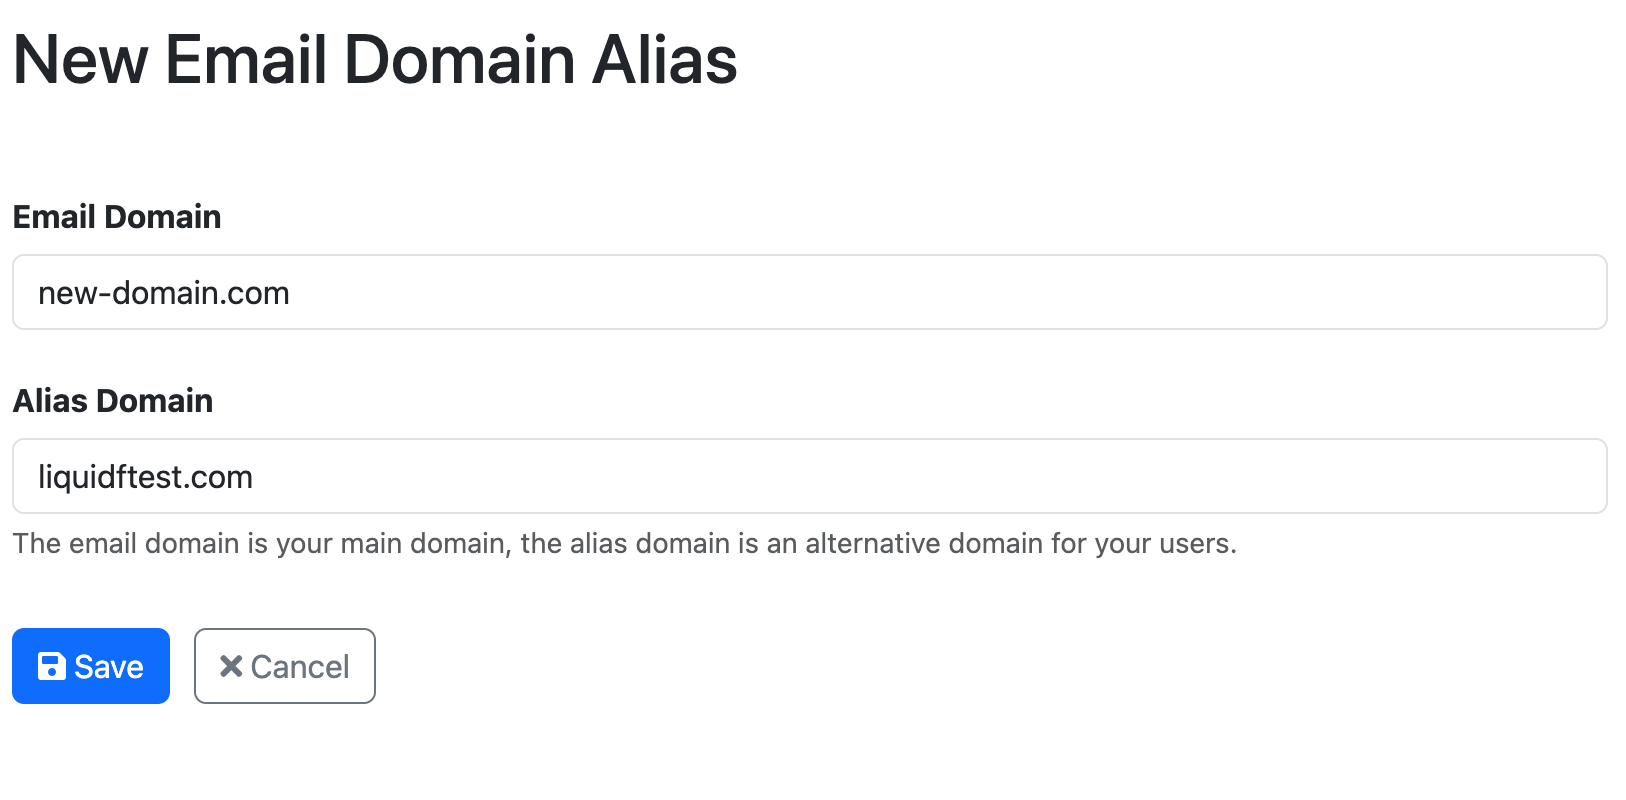
And once saved, this will look like the following:
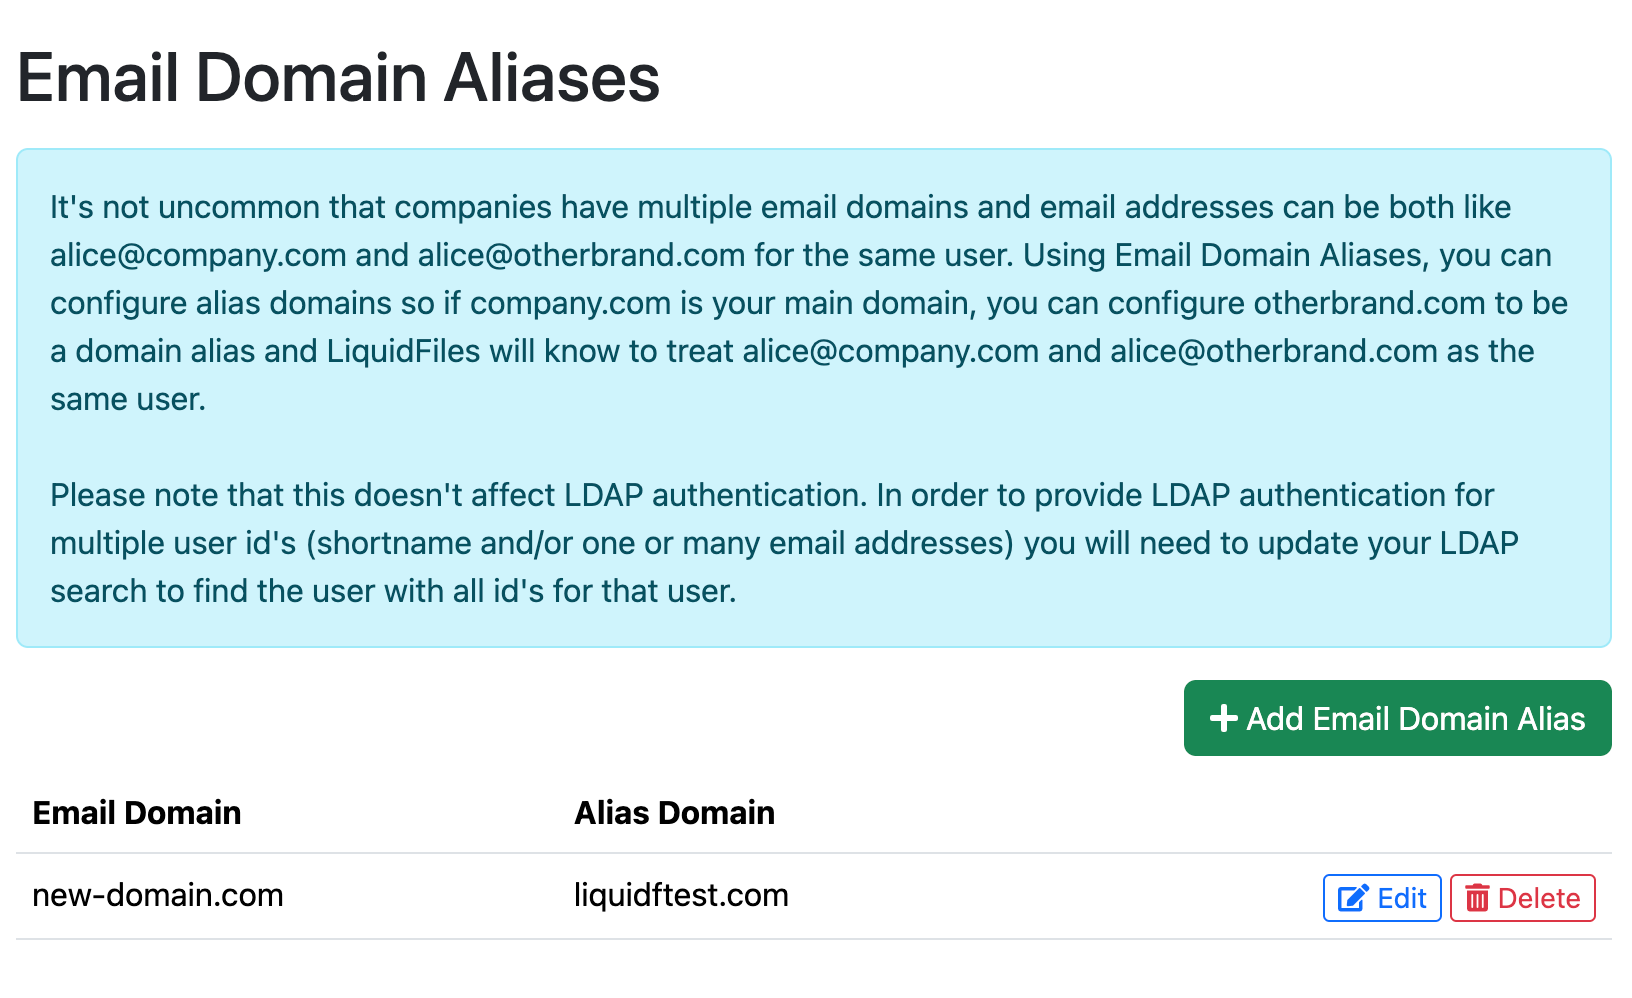
This will now instruct LiquidFiles that all @liquidftest.com emails will be treated as @new-domain.com emails. So when a message is sent to sumiko.boyle@liquidftest.com and she logs in with sumiko.boyle@new-domain.com, LiquidFiles will now know this is the same users. And same, if she logs in with sumiko.boyle@new-domain.com, it will really login the user with account sumiko.boyle@liquidftest.com so the transition will be seamless for your users.
There's now only one more step to complete. We need to redirect your users from your previous Public Hostname to your new one.
Redirect Considerations
A LiquidFiles URL has the format similar to https://liquidfiles.company.com/message/Vd7Uph26oQqplYbEZnoBPm. In this case https://liquidfiles.company.com/ is the Public Hostname and /message/Vd7Uph26oQqplYbEZnoBPm is the relative path. The Public Hostname doesn't matter when finding data on the LiquidFiles system so if you change the Public Hostname to something else, the path /message/Vd7Uph26oQqplYbEZnoBPm will still lead to the same message.
- Old Hostname: https://files.domain1.com/message/Vd7Uph26oQqplYbEZnoBPm
- New Hostname: https://files.domain2.com/message/Vd7Uph26oQqplYbEZnoBPm
Will both lead to the same message.
From a brief overview, it may seem that simply updating DNS to point both the new and old hostname to the same system, and have the system itself redirect (or use) both the new and old hostname would be the way to go. But this doesn't work. The reason this doesn't work is that you can only have one certificate installed on the LiquidFiles system, and HSTS will prevent your browser from connecting to the old hostname with an invalid certificate (the certificate for the new hostname).
Configuring Redirects Overview
To configure redirects, you will either have to setup (or use) your own web server to perform the redirects, or use a URL redirection service. If you're most comfortable configuring IIS then a web search for IIS url redirect configuration should provide the information you will need.
The steps involved:
- Configure your redirect web server for your old hostname, https://liquidfiles.olddomain.com as an example.
- Ensure you install the current or a new SSL certificate for the old hostname liquidfiles.olddomain.com on your redirect web server.
- Configure redirect rules using permanent redirects (301) from https://liquidfiles.olddomain.com/* to https://liquidfiles.newdomain.com/* (* symbolizes any path).
- In your DNS server or service, add a new A record for your new hostname or domain, https://liquidfiles.newdomain.com as an example.
- Update the Public Hostname on your LiquidFiles system to your new hostname or domain.
- Install a certificate for your new Public Hostname, liquidfiles.newdomain.com.
- Change the A record for liquidfiles.olddomain.com to the redirect web server.
Redirect Service Example
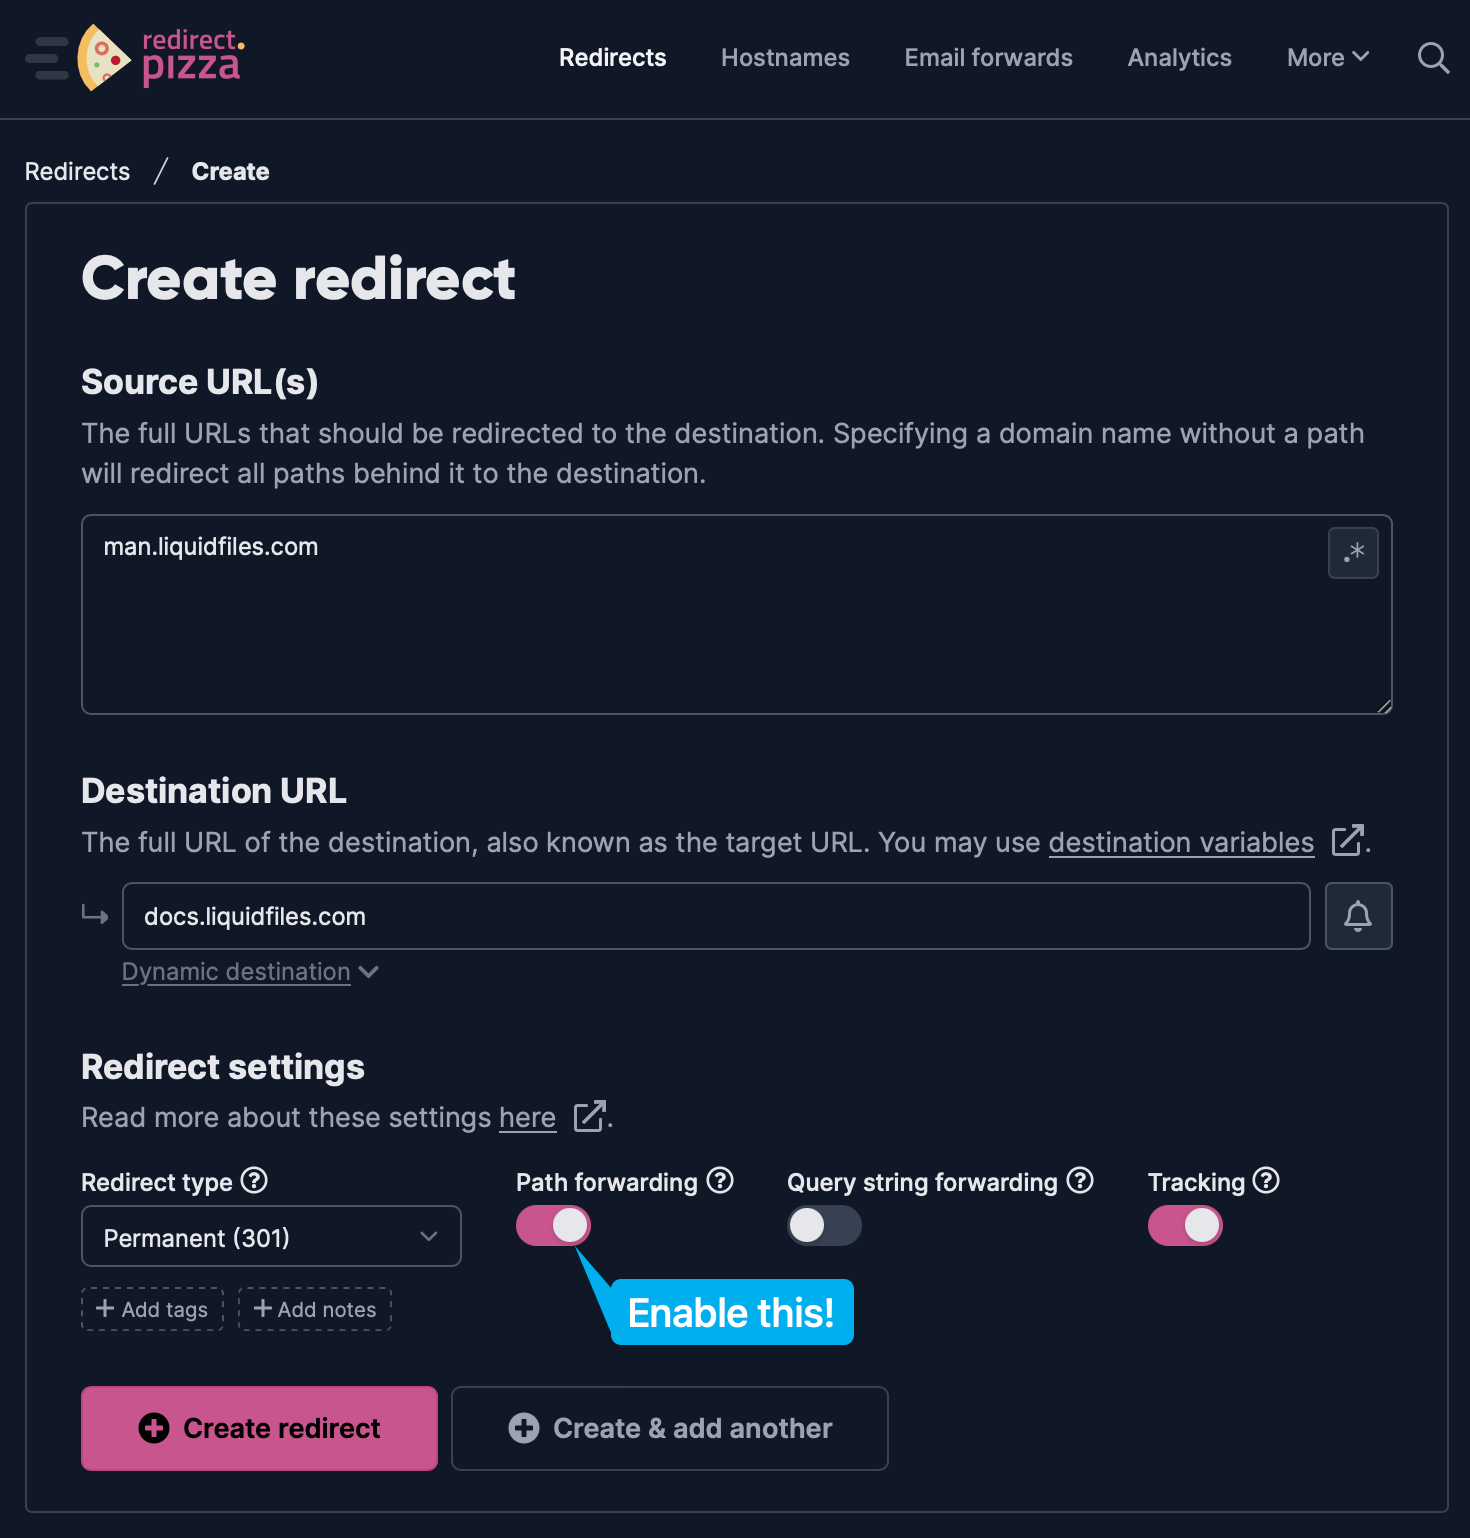
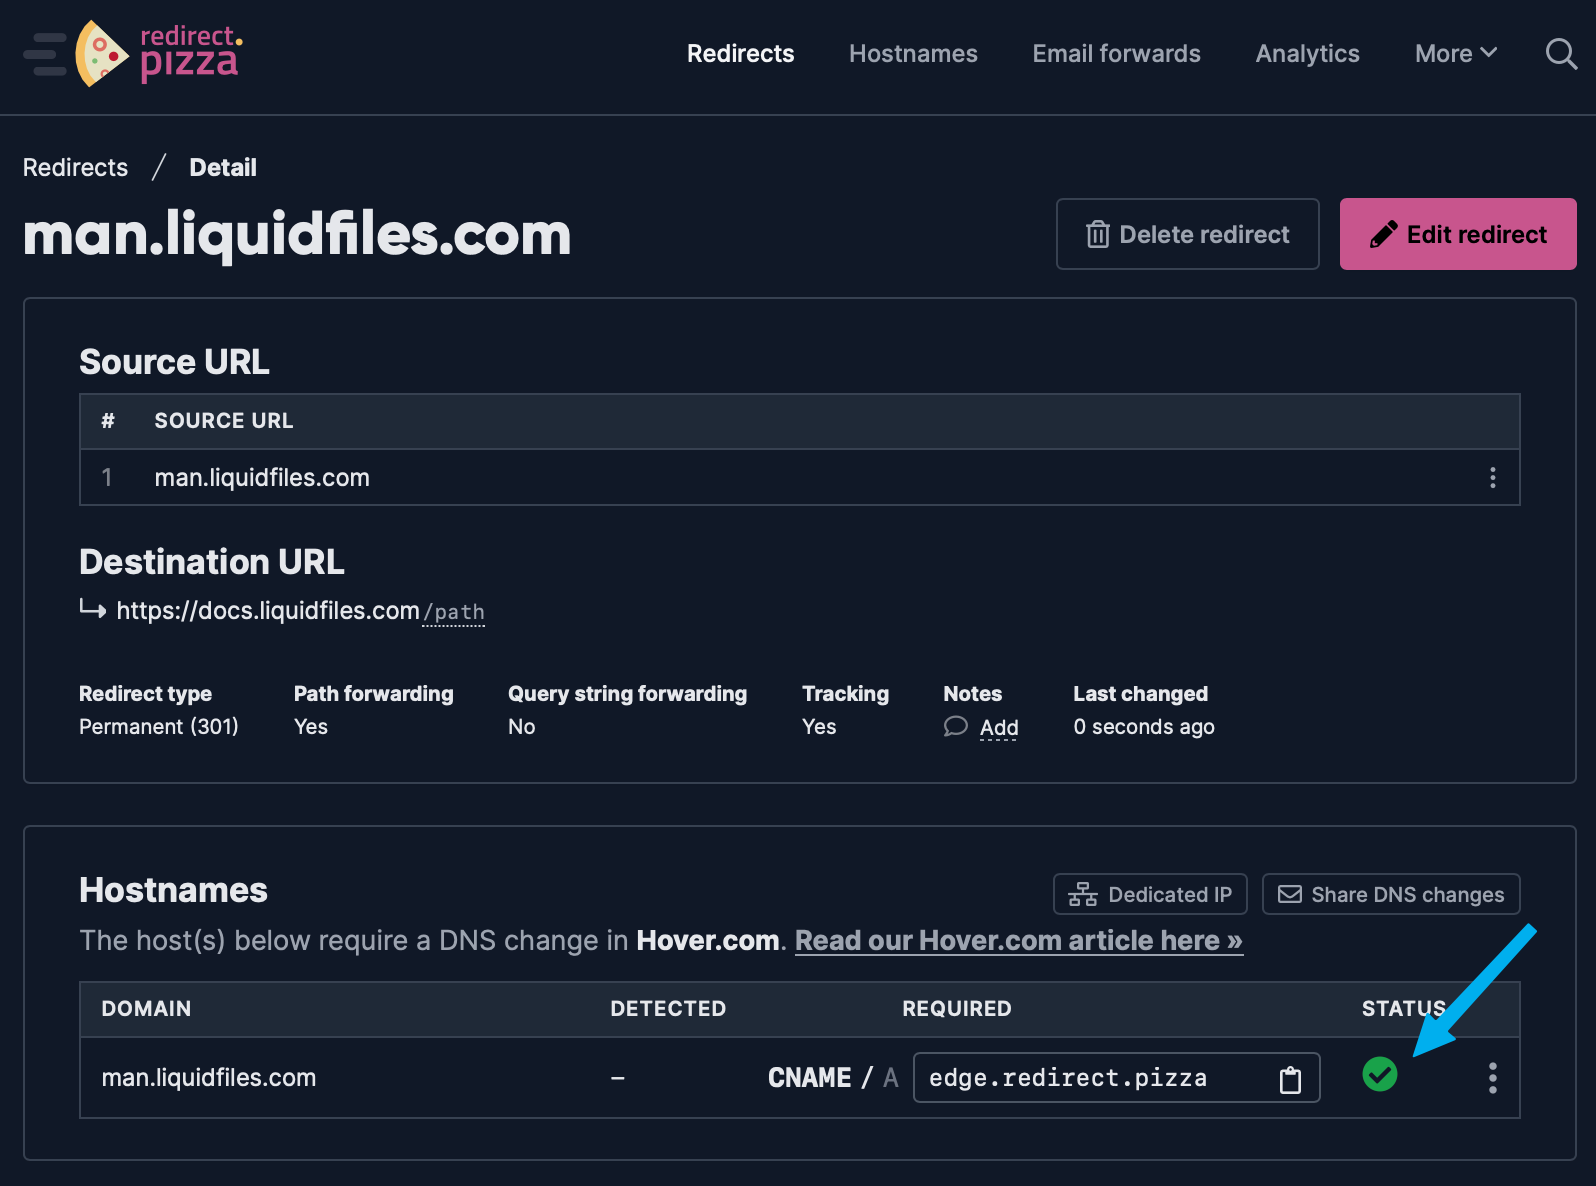
In this example, we're going to use https://redirect.pizza as a redirect service and for this example we're going to redirect https://man.liquidfiles.com to https://docs.liquidfiles.com. This is obviously our documentation site, but the process for redirecting is no difference for different types of sites.
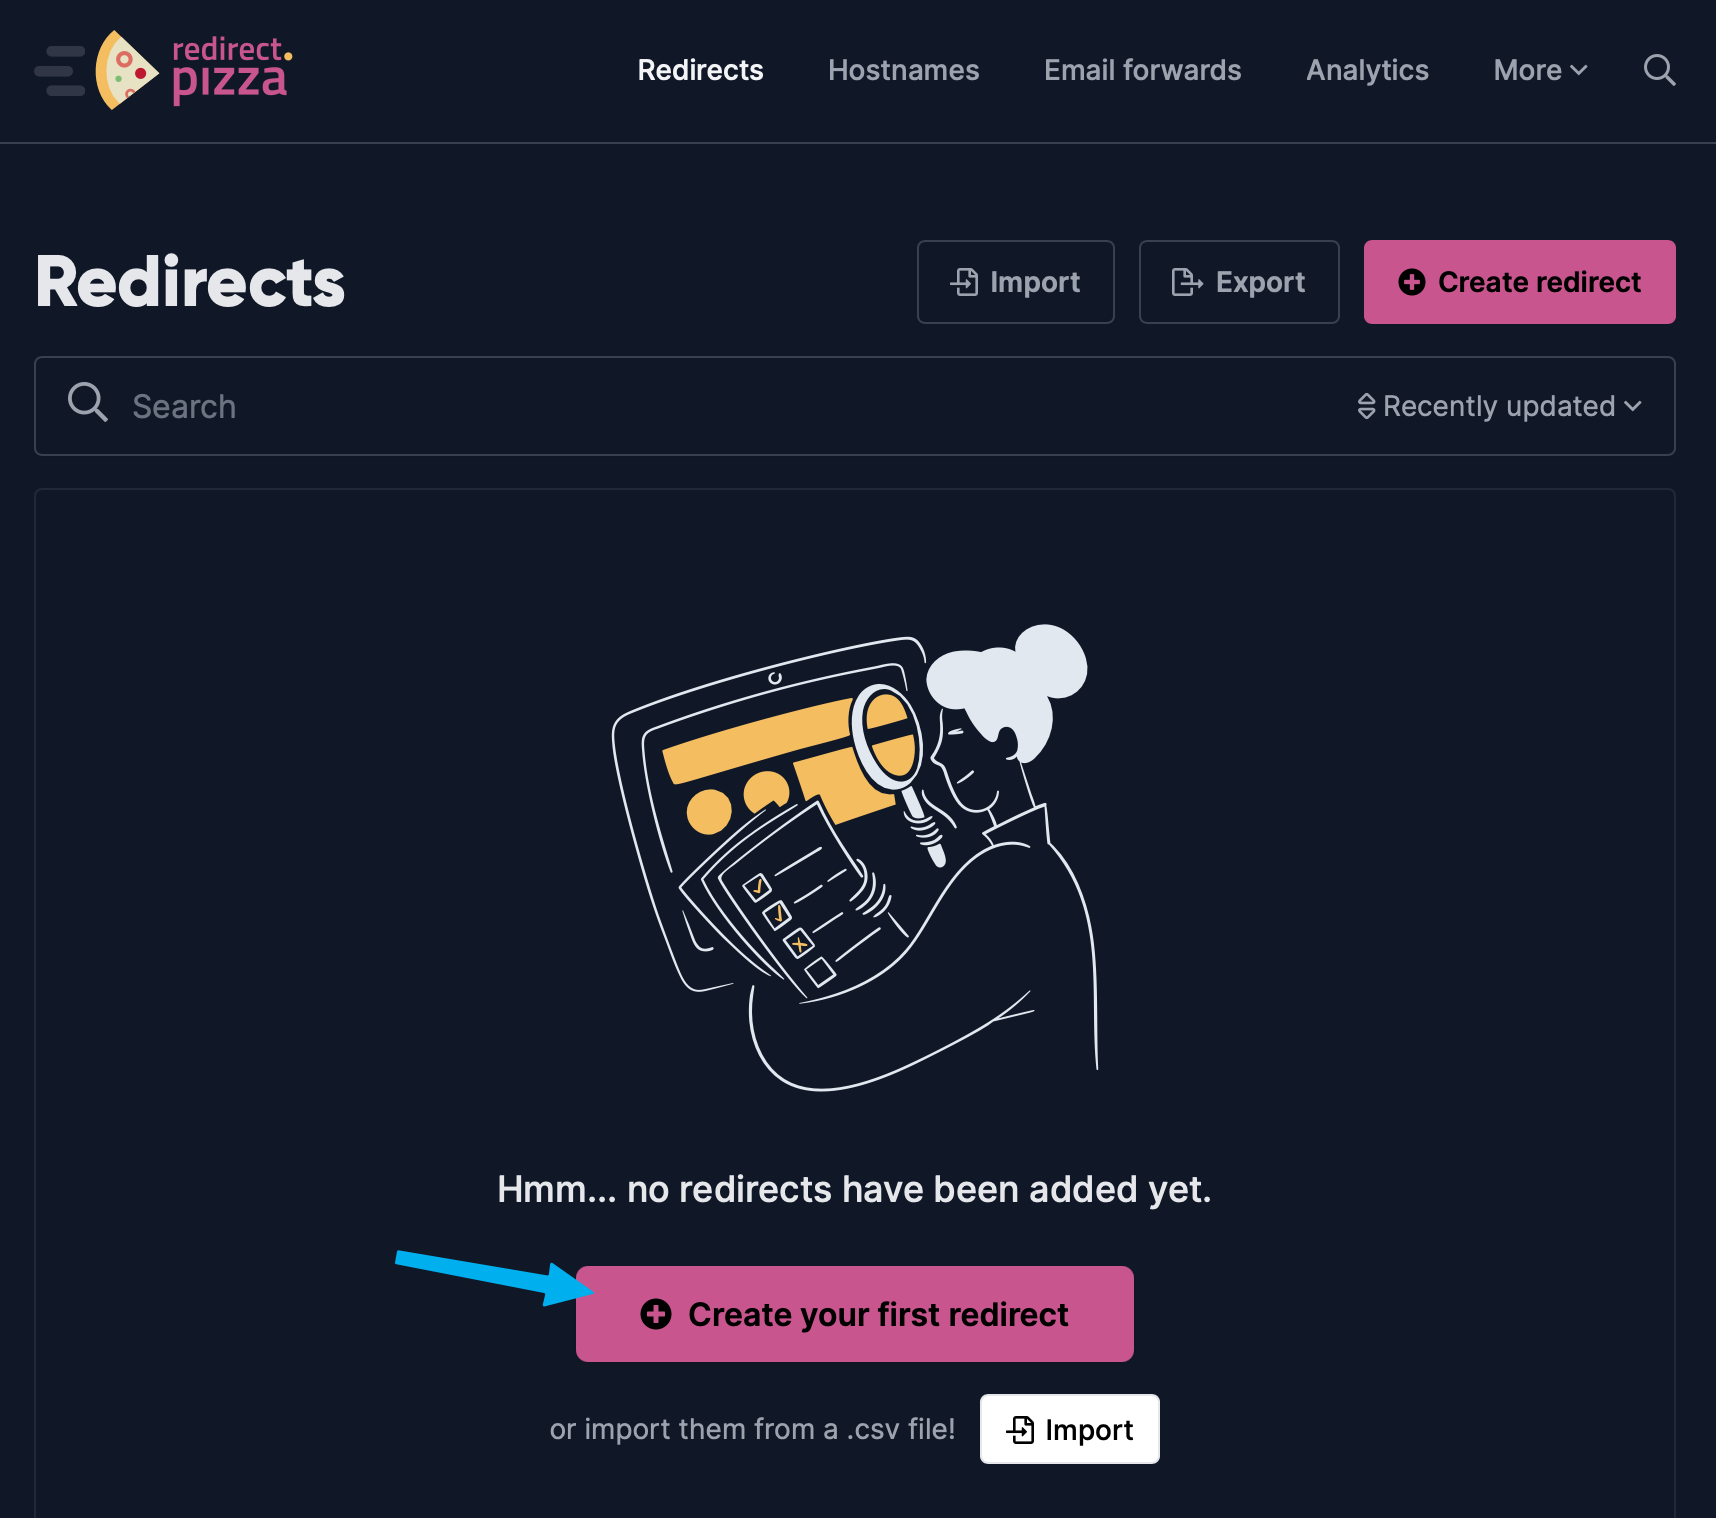
After you've created and verified your account, you will be see this page, where you can start creating your redirect.
We can now create the redirect. Please make sure you've enabled Path Forwarding.
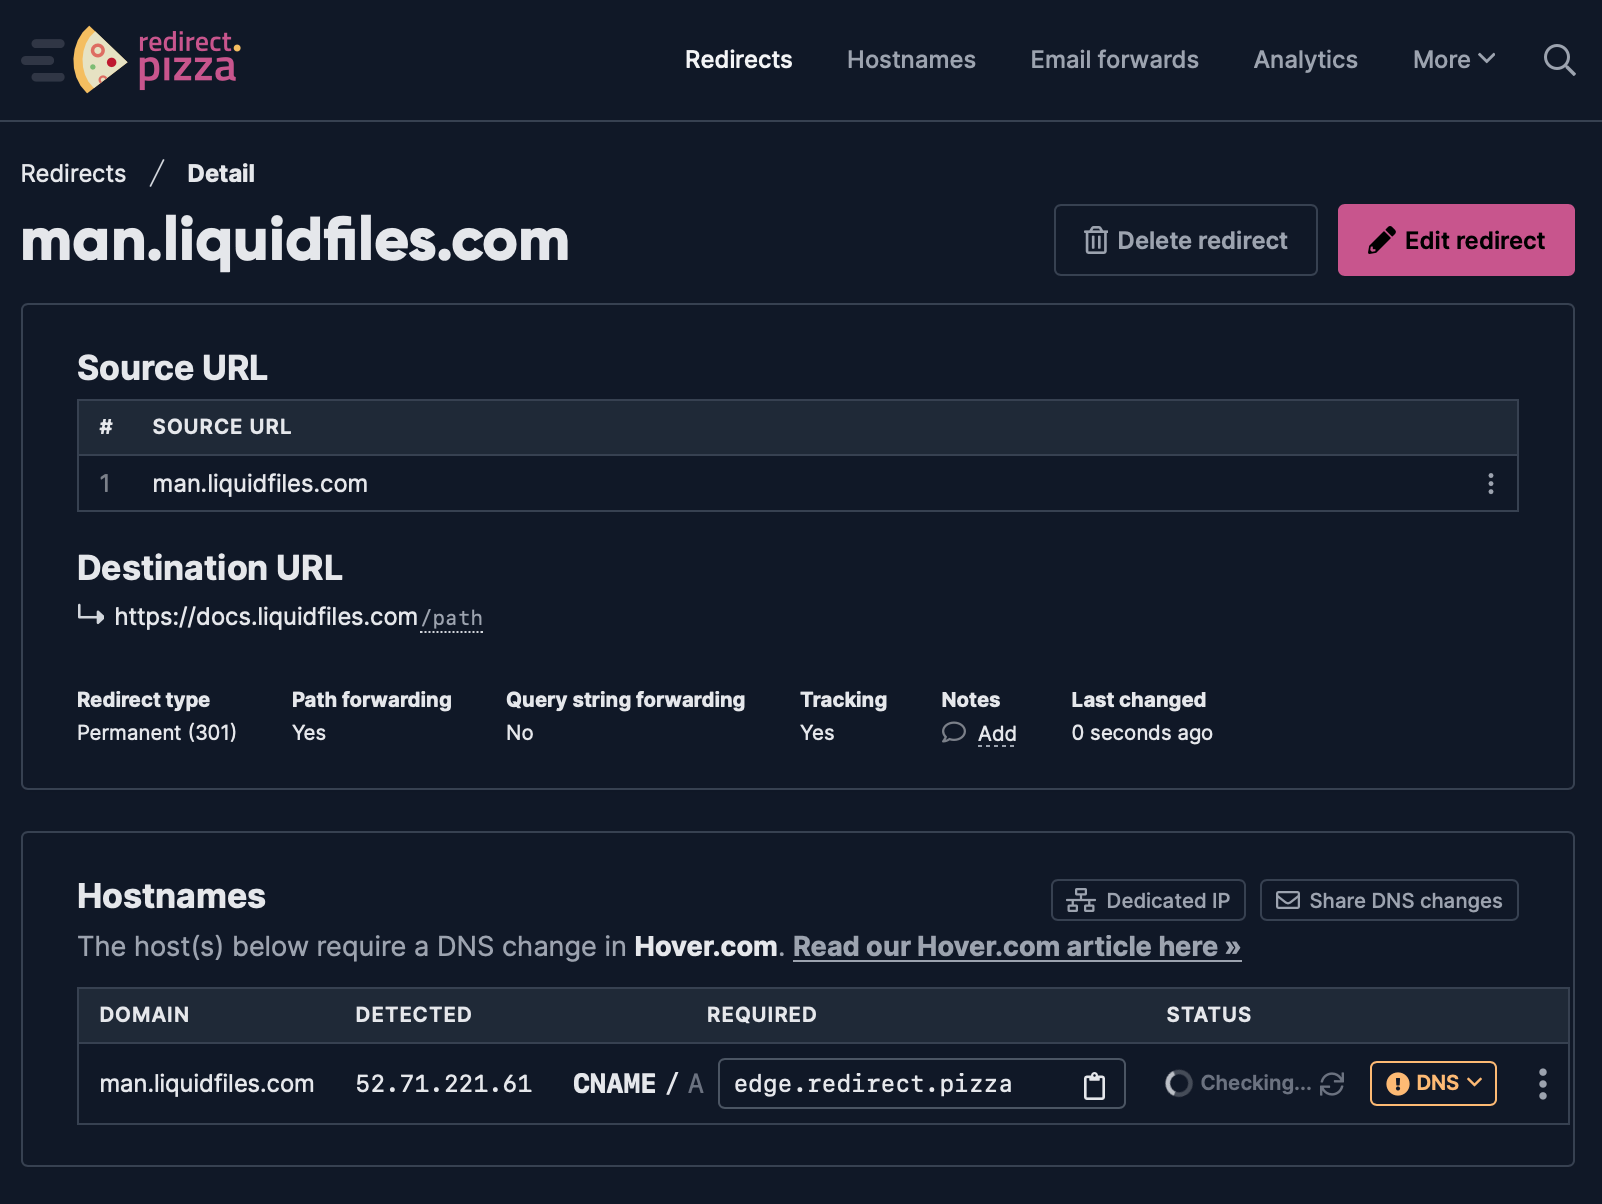
The redirect pizza configuration is not created and it prompts us to update our DNS.
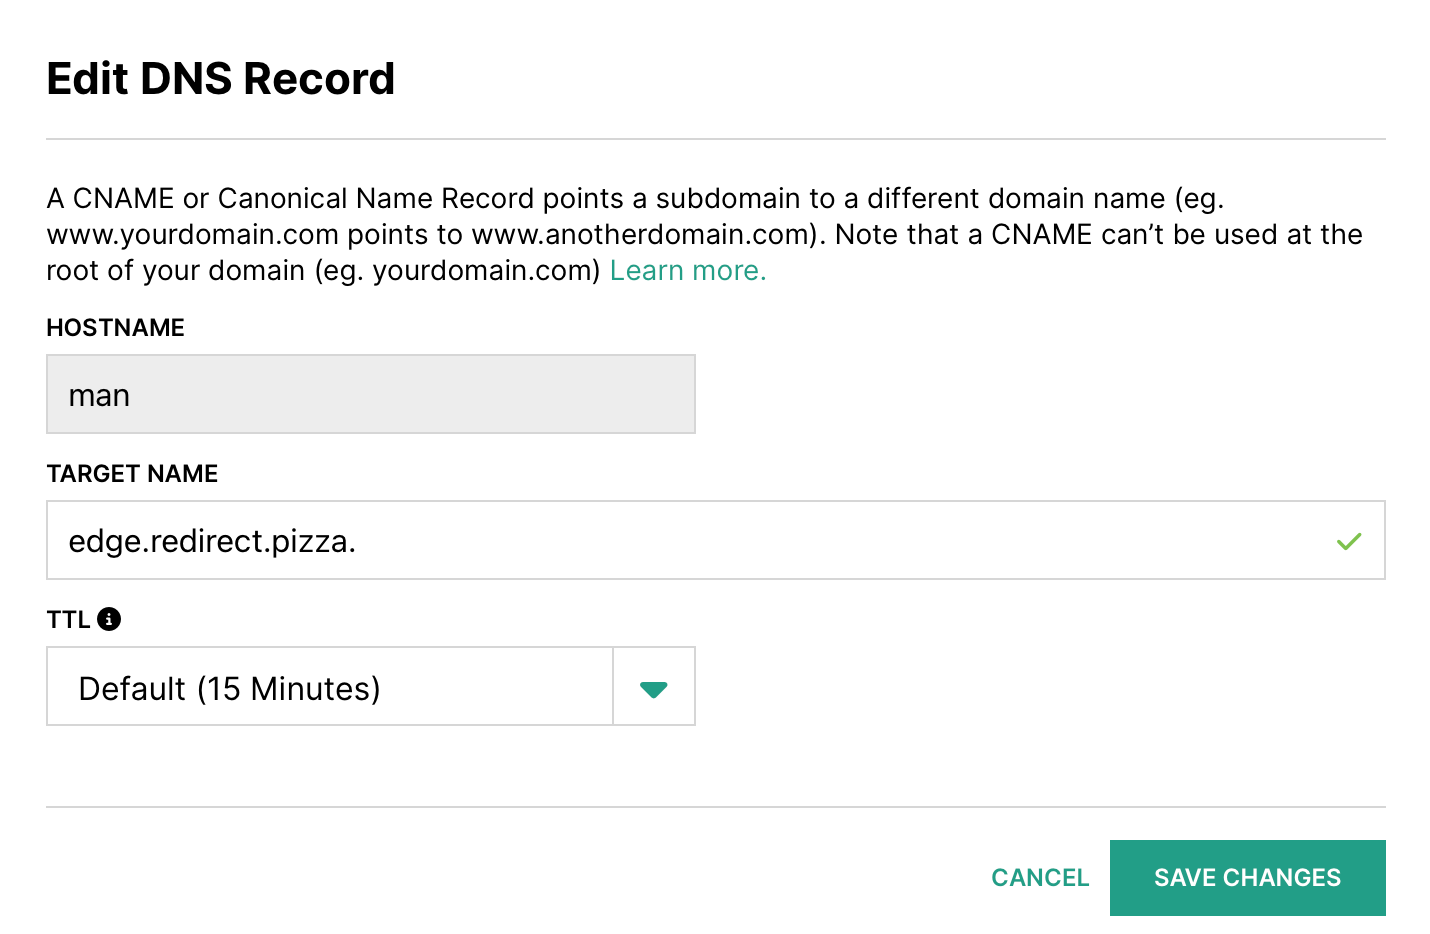
Depending on the previously configured TTL, it will dictate how long you'll have to wait before the redirect will become active. In this case, we'll have to wait 15 minutes. See if you can lower this a couple of days before you're doing this on a production system to minimize waiting.
After waiting 15 minutes, we can now see in the redirect pizza configuration that that it's been verified as correct.
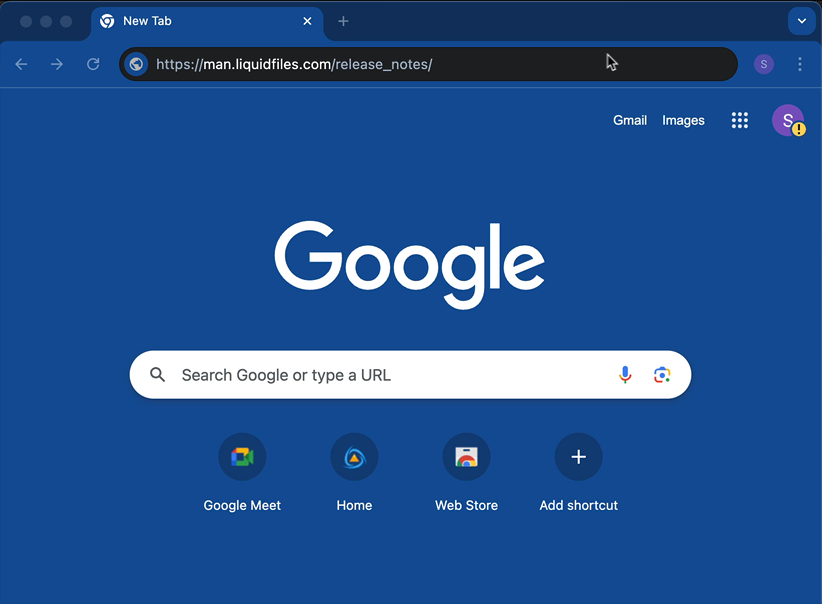
We can now test that the redirect works as expected. In the case of your LiquidFiles system, you can test with a Secure Message or similar. As you can see in the following there's no SSL warnings or errors or similar and the old hostname is now redirecting to the new hostname.
Installable Redirect Function
If you want an installable redirect function, we can recommend Nginx Proxy Manager. It's installed using Docker so you will need to be comfortable using Docker if you wish to use Nginx Proxy Manager.
Nginx Proxy Manager is what we're actually using to redirect the old https://man.liquidfiles.com url to https://docs.liquidfiles.com, and other redirects as well (https://doc.liquidfiles.com → https://docs.liquidfiles.com, ...). Nginx Proxy Manager will not only simplify the redirect configuration but will also handle certificate generatation and renewal using Lets Encrypt that's needed from pretty much every site these days.
While we're making this recommendation, this is not something that we're officially supporting so if there's something not working as expected, you will need to contact support at https://nginxproxymanager.com.